Uncategorized

Stampin’ Up Waterfront masculine Card

Good Thursday morning Everyone! I haven’t posted much lately, and I truly don’t know where the time goes. It just flies right on by. Before you know it we will be thinking 4th of July patriotic events, parades and picnics. However, for today’s card I am playing along with three  challenges. They all fit in with a card I needed for my doctor who is retiring. I don’t know if he is a fisherman, but this card suggests it might be a good pastime for him.

The first one is Challenge # 218 Whatever the Weather on the Cardz 4 Guys Blog.

cards for guyz

The second challenge is  a sketch challenge from Try Stampin’ on Tuesday. For this one you can use either the colors or the sketch, but I chose the sketch since I was doing a masculine card, and turned it on its side.

april mix up 404

The third challenge is from Stinkin’ Inkers and is “Lovely as a Tree”.  The requirement is to use a tree on the card. I used several!Stinkin' Inkers Header

Here is the card I created.1

I began with a card base of Blueberry Bushel and ran it through the Big Shot with the Subtle Dynamic Textured Embossing Folder.  A strip of Wood Textures DSP was Liquid Glued in the center.

For the art piece, I used the largest Stitched Shapes circle die and cut it from Very Vanilla. Using the Waterfront stamp set, I stamped the water in Pacific Point and Balmy Blue, stamping off once on some of the images and full strength on the rest.

With Smoky Slate and the single ‘land’ stamp, I stamped the shorline, then stamped a second time on an angle to make it more realistic.

Next are the trees, as per the Stinkin’ Inkers Challenge. These were stamped in Mossy Meadow on the right, using the complete tree stamp from Waterfront. Inking only the top half of the stamp, I stamped over the first image to create a forest. Moving to the left side, I repeated, inking only the top of the stamp.

2

For the sky, I sponged some Balmy Blue, Highland Heather and Smoky Slate very lightly. Then I went back over some of the sky with Highland Heather, trying for a sort of stripe effect to look like rain coming down. This was not too successful, but, no matter.

The clouds are actually the exhaust stamp from Geared Up Garage, stamped off once, then rotated and stamped again a couple of times. I think this fulfills the requirements of the Cardz 4 Guys challenge of weather. Fishing is often best when the weather is not the best.

The fisherman was stamped in Memento Tuxedo Black. I then colored in his face and hands with my Petal Pink Stampin’ Write Marker. His hat was colored with the Crumb Cake marker and his clothes with Crumb Cake, Mossy Meadow and Smoky Slate. I wanted a camouflage look, but you can’t really see that.

This circle was adhered to the card front with Stampin’ Dimensionals. To finish, I used my Basic Black Stampin’ Write Marker to ink the rest of the fishing line on the card front, and Memento Tuxedo Black to ink the sentiment in the lower left corner.

1

For the inside, I used more of the Wood Textures DSP as a mat, and a panel of Balmy Blue, run through the Big Shot with the second largest Stitched Rectangles Framelits die, for the sentiment. The sentiment, from Colorful Seasons, as is the one on the card front, was stamped in Memento Tuxedo Black, using my Stamparatus. I wanted the sentiment to be dark, and using the Stamparatus allowed me to stamp it a second time.

5

The trout is stamped in Smoky slate and left as an outline image.

The Very Vanilla Medium Envelope flap has more of the Wood Textures DSP, and another outlined fisherman on the front, stamped in Smokey slate.

I think this is a nice card for any man, and I hope the newly retired Doctor likes it. I will write a personal note as well.

Thank you for stopping by. Leave comments below, and be sure to check the retiring list in case there is something there that you want to get before it is gone.  Just click here to see what will be gone at the end of May.

The new annual catalog will be ready for you to order goodies on June 4. If you do not have a demonstrator and would like a catalog, please let me know.

CARD CUTS: Blueberry Bushel: card base 5-1/2″ x 8-1/2″, scored at 4-1/4″; Wood Textures Designer Series Paper stack: center strip on front 1-3/4″ x 5-1/2″, inside mat 4″ x 5-1/4″, envelope flap 2-1/2″ x 6″; Balmy Blue: inside liner 4″ x 5″; Very Vanilla: to cut circle 3-1/2″ x 3-1/2″ or larger.
Product List

Uncategorized

Stampin’ Up! Golden Afternoon Thoughts

Oh! My! Goodness! Can you believe I need five masculine cards for next week??? Yep, one for a friend who is ill, 3 birthdays and a retirement. So, busy little beaver that I am, I will post a masculine card today, and one every day next week. You never know when that 6th one might come in handy.

I began with an Early Espresso card base for this one, and used my most favorite DSP, the Wood Textures 6″ x 6″ pack. I hope Stampin’ Up! makes some of these in 12″ x 12″, especially the whitewashed one. I used it first from every pack I purchased.

4

I used the Stamparatus for all the stamping to get everything where I wanted it, and because I was stamping Early Espresso on the wood, I wanted it to be DARK. This meant stamping twice, or three times.

I first stamped the Golden Afternoon tree, then the small deer from the Dashing Deer  (from Holiday catalog but still available) stamp set. I stamped the one with antlers in Early Espresso on Early Espresso card stock and die cut it with the matching die.

Using the small grass stamp from High Tide, I stamped grass along the bottom of the panel. One deer is grazing, so she had to have something to eat, right?

4

Using a Sponge Dauber and Early Espresso Ink, I went around the edges of the panel to give it an even more rustic look. THEN I added the die cut deer with Mini Stampin’ Dimensionals. I cut tiny strips from the edge of the Dimensionals for his legs.

The sentiment, also from Golden Afternoon, was stamped in Versamark ink after I went over the whole panel with my Embossing Buddy. I didn’t want copper anyplace but the sentiment. I then heat set the Copper Stampin’ Emboss Powder with my heat tool. A double length of Copper Metallic Thread and one length of Linen Thread were wrapped around the panel together and tied in a small bow. A Glue Dot keeps the bow in place on the front and a couple pieces of tape secured the back.

1

I used Tear & Tape to adhere a Copper Foil Sheets panel to the card base and Stampin’ Dimensionals adhered the Wood Textures DSP panel to the copper mat. Card front done.

Another Early Espresso tree on the inside and a scrap strip of copper at the bottom of the panel add some interest to an otherwise plain panel. Copper Emboss Powder was used with Versamark again for the sentiment, which is from Healing Hugs, then set with my heat tool. The copper strip was adhered with Liquid Glue.

5

The Medium Crumb Cake Envelope (no longer available, but I had them leftover, so why not use them) has a couple of Early Espresso Dashing Deer on the front and a piece of the Wood Textures DSP on the flap.

2

3

I rather like this look of the stamps on the wood.

CARD CUTS: Early Espresso: card base 5-1/2″ x 8-1/2″ scored at 4-1/4″, deer 2″ x 2-1/2″; Copper Foil Sheets: front mat 4″ x 5-1/4″, inside strip 1/4″ x 5-1/4″; Wood Textures Designer Series Paper: front art piece 3-3/4″ x 5″, inside liner 4″ x 5-1/4″, flap 2-1/2″ x 6″

Product List

Uncategorized

Stampin’ Up! Golden Afternoon Sympathy

Good Morning Everyone. Well, here it is Friday already, and another week gone. Just a couple more days and March will be history.

For today I had to make yet another Sympathy card. Golden Afternoon is perfect for this occasion, or for others I can think of as well. To me the stamp set is serene, speaking quietly of peace, calm and even the presence of the Lord.

4

My card base is Early Espresso and the art piece is from the 6″ x 6″ Wood Textures Designer Series Paper. I stamped the tree in Early Espresso using my Stamparatus because I wanted a really dark image.

Stampin’ Blends in Light Mossy Meadow and Dark Granny Apple Green were used to color the leaves on the tree and the plants at the base of the tree. Light Crumb Cake colored the trunk and branches.

Some birds in Pacific Point, stamped off once, fly past the tree.

4

The sentiment is stamped in Versamark on the back side of a scrap from the front, and heat embossed in Copper Stampin’ Emboss Powder. (TIP- Anytime you use embossing powder, use the Embossing Buddy to de-static the paper so the embossing powder does not stick where you don’t want it.) This was cut with the Tailored Tag Punch. I punched another in Mossy Meadow, cut it in half horizontally and Liquid Glued it to the back of the sentiment tag, spreading it to form a mat.

1

Some Stampin’ Dimensionals on the back (8!) gave me plenty of sticky to wind some Copper Metallic Thread around and still have enough adhesion to stick to the 5/8″ Burlap Ribbon underneath. I had put a strip of Tear & Tape on the back of the Burlap Ribbon, wrapped it around the Wood Textures DSP and taped it to the back.

More Stampin’ Dimensionals on the back of the art piece adhere this card front to the Mossy Meadow mat, which is stuck to the card base with Liquid Glue.

5

Inside, another panel of Wood Textures DSP, same as the front, is stamped with more Pacific Point birds in full strength, and sentiments from Lasting Lily in Mossy Meadow.  The scripture verse on the opposite side is from Hold on to Hope and is stamped in Early Espresso, also on the Wood Textures DSP. I also stamped the small tree from Golden Afternoon in Early Espresso, letting it run off the paper. This was adhered with Liquid Glue. The Sentiment liner was adhered to the Mossy Meadow mat and into the card base with Liquid Glue.

The Crumb Cake Envelope (retired) has another small tree on the front in Early Espresso and more of the Wood Textures DSP on the flap with a few birds flying by.

2

3

I hope you like my card, but if you don’t that’s ok. Please leave comments. Below are the card cuts and products used for this card.

CARD CUTS: Early Espresso: card base 5-1/2″ x 8-1/2″ scored at 4-1/4″; Mossy Meadow:front mat 4″ x 5-1/4″, inside mat 4″ x 5-1/4″, front sentiment mat 2″ x 3″; 6″ x 6″ Wood Textures Designer Series Paper: front art panel and inside liner 3-7/8″ x 5-1/8″, second sentiment panel inside 2-3/4″ x 3-1/2″, front sentiment 2″ x 3″

Product List

sympathy

Stampin’ Up! Golden Afternoon for Happy Inkin’ Thursday Blog Hop

Good morning All! We are still in the deep freeze, though the freeze isn’t as deep as it was earlier in the week. It seems that whenever it warms up a bit we get more snow. We shall see if the predicted amount happens today. But, it IS March, which means that spring can’t be too far away. Oh, and by the way, just in case you haven’t heard, this weekend is the time to turn your clocks forward. Already???

My card for today is one of the unfortunate ones we all have to make from time to time….sympathy. Two friends  lost their fathers this past week, so I have been in the sympathetic mode. What better stamp set to use than Golden Afternoon? It has both as quiet scene and great sentiments for the purpose.

Our hop challenge today is color, also perfect for a sympathy card:

And here is the card I created

4

This is without a doubt the easiest card I have ever made. It is truly simple, and quick to make. Only one stamp set, no dies and two inks. Easy Peasy.

I began with a Night of Navy card base, a mat of Balmy Blue and an art piece in Whisper White. I stamped the large tree from Golden Afternoon in night of Navy, the birds in flight in Balmy Blue, and the sentiment also in Balmy Blue.

1

This was adhered to the Balmy Blue mat with Liquid Glue and Stampin’ Dimensionals adhered this card front to the card base.

On the inside, I used the same Balmy Blue mat, and liner in Whisper White. I wanted room to write, so I only stamped some Balmy Blue birds, or would that be Balmy Bluebirds?? Just kidding.

5

Liquid Glue was used for adhesion of both pieces.

The envelope got the small tree from the stamp set in Night of Navy ink, with more of those Balmy Blue birds on the flap.


See, I told you it was easy.  Now on with the hop. Our very creative team will no doubt have some wonderful projects for you. Clicking the ‘next’ button will take you to the uber creative Eve, but you can click on any name to just hop around.

Amy Koenders

Shelagh Freemantle

Mary Deatherage

Kristi Gray

Jaimie Babarczy

Sue Prather

Karen Finkle

Julie Johnston – You are Here

Eva Dobilas

CARD CUTS: Night of Navy: card base 5-1/2″ x 8-1/2″ scored at 4-1/4″; Balmy Blue: front mat and inside mat 4″ x 5-1/4″; Whisper White: front art piece 3-7/8″ x 5-1/8″, inside liner 3-3/4″ x 5″

Product List

Uncategorized

Stampin’ up Buffalo Check Nature Sings revisited

Good morning, All. Today my card is the second of the two that I began for the hop yesterday. After deciding to follow both the sketch and the color inspirations, the decision was made to save this card for another blog post.

Ta-Da! 4

This was my original idea, but, to be able to use both the color and sketch I changed it for the blog hop. For this one, I did the plaid the same way, then tore the long sides, leaving it long enough to fit the card base. I then stamped the Gray Granite panel with images and sentiment from Nature Sings. The elk are Gray Granite, the trees Mossy Meadow and the sentiment is Cherry Cobbler.

This was then dry embossed with the Subtle 3D Dynamic Textured Impressions Embossing Folder and adhered to the plaid with Liquid Glue. My Linen Thread was dragged through the Mossy Meadow ink pad and left to dry while I did the inside of the card.

For the inside, I took one of the torn off pieces of plaid and Liquid Glued it to the top of the Gray Granite liner. The elk were again stamped in Gray Granite and a couple of pine boughs in Mossy Meadow. The sentiment is in Cherry Cobbler. Again, all images and the sentiment are from Nature Sings. Beautiful stamp set!

5

This liner was adhered to a Mossy Meadow mat with Liquid Glue and into the card base, also with Liquid Glue. I should have stock in Tombow!

After the Linen Thread had dried I wrapped a length around the plaid sentiment panel and taped it on the back. I made an identical bow to the one for yesterday’s card and would have used a Glue Dot to stick it to the front, but it wouldn’t stick. Perhaps it wasn’t totally dry? Anyway, I wound up using a dab of Liquid Glue to adhere it to the card front.

1

Something was missing though. I kept looking at it and decided that the sentiment panel should have been affixed to a mat. Too late. It was firmly stuck! Nothing to do but leave it alone, or…..cut a couple of strips to edge the sentiment panel. In the end, that was my solution and I don’t think it looks too bad. This (finally!) finished panel was adhered to the card base with Stampin’ Dimensionals.

Actually, I like this card better than the one I did yesterday. Even so, I might try it with Very Vanilla instead of the gray, or maybe even Whisper White? What do you think??

The envelope is the same as yesterday’s also. I considered adding the elk, but was too lazy to clean another stamp, so just did the trees.

Feel free to leave comments below.

If you do not have a demonstrator and would like to place an order in my online store, just click on the bird photo at right that says Order Online. If you place an order up to $50 please use the Host Code WV7QS9PE. Click here for details on when to use the host code. Or, if you have questions, don’t hesitate to contact me.


We had another update from Stampin’ Up! yesterday afternoon. Well, at any rate it was afternoon when I got the email as I was away all morning and too busy to check my email. Seems there was an issue with their inventory management system and now they are discovering that many items in the Holiday catalog are running low. Below is the gist of the email:


HOLIDAY CATALOG INVENTORY PROBLEM

There is always a risk of products selling out without enough time to reorder and restock inventory before a catalog life cycle is over. When this does happen, it is usually caused by a higher-than-forecast demand. However, as we upgraded our inventory management system, there were system communication issues with the current holiday catalog and we have just determined that several products are at high risk of early depletion.

These products are running low and additional shipments will not be received before the end of the catalog:

  • SNOWFLAKES & STARS WIRE ELEMENTS (item 147819)
  • SANTA’S SIGNPOST FRAMELITS DIES (item 147911)
  • CHICKEN WIRE ELEMENTS (item 147807)
  • ALPINE SPORTS THINLITS DIES (item 147916)
  • SINCERELY SANTA PROJECT KIT (item 148029)
  • FESTIVE FARMHOUSE COTTON TWINE (item 147888)
  • 5/8″ STRIPED BURLAP TRIM (item 147889)
  • DETAILED LEAVES THINLITS DIES (item 147921)
  • IN THE WOODS FRAMELITS DIES (item 147919)*
  • DETAILED DEER THINLITS DIES (item 147915)*
  • GALVANIZED BUTTONS (item 147891)
  • GALVANIZED CLIPS (item 147806)
  • TAKEOUT THINLITS DIES (item 147927)
  • SWIRLS & CURLS TEXTURED IMPRESSIONS EMBOSSING FOLDER (item 147923)*
  • TRANQUIL TIDE 1/4″ VELVET RIBBON (item 147802)
  • REAL RED 3/8″ MIXED SATIN RIBBON (item 147894)
  • MERRY CHRISTMAS THINLITS DIES (item 147912)*
  • FARMHOUSE FRAMELITS DIES (item 147922)

We don’t know when these products will go out of stock, but it’s possible some may run out as early as next week.

We have also indicated with an asterisk (*) which of these products will carry over into a future catalog.  So those items can be ordered at a later date.

We are working to fix the system communication errors to avoid similar problems in the future. Thank you for your patience.


SO! Be advised that if you want any of these, you will need to order right away unless it is an item that will be carried over and you can wait for it. I am sure Stampin’ Up! was as dismayed by this as many of you, but things do happen-sometimes especially with computers! How we would get along without them though…..

ALSO: Direct from Stampin’ Up!:


Sales for the following products have exceeded our forecast and are continuing strong, resulting in a large number of backorders. Because backorders are so costly, we have made the decision to shut these items off effective immediately. Since these products cannot be sent from the manufacturer in time for the holidays, these item numbers will not be reactivated.

150095: Santa’s Workshop Cards You Can Make It Bundle
147905: Santa’s Workshop Memories & More Card Pack
147815: Santa’s Workshop Memories & More Cards & Envelopes

147816: Joyous Noel Specialty Designer Series Paper
147890: Festive Farmhouse Elements
147811: Santa’s Workshop Enamel Elements


CARD CUTS: Cherry Cobbler: 5-1/2″ x 8-1/2″ scored at 4-1/4″; Gray Granite: plaid 4-1/2″ x 6″, front sentiment panel 2″ x 5-1/4″, inside sentiment panel 4″ x 5-1/4″; Mossy Meadow: inside mat 4-1/8″ x 5-3/8″, strips to border front sentiment (2) 1/8″ x 5-1/4″

Product List

Uncategorized

Stampin’ Up! Christmas Roots and Baubles

It’s FRIDAY! Busy weekend coming up for me! How about all of you? Great plans? Or just relaxing and enjoying some quiet time?

Well, let’s get on with today’s card, shall we? I know that is why you all came. I chose pretty traditional Christmas colors for today’s card-green and red.

4

It also fits in with the Holly and Ivy Challenge #38 – Anything Christmas Goes

holly and Ivy

My thoughts went to the recently received Beautiful Baubles Bundle and I thought I would use the big, beautiful bauble, and even put the stamp on a block ready to use. But wait! My thoughts turned to trees and a forest scene. (What? Me? make a forest scene?) I looked more closely at the thinlits in that bundle and came up with this card.

The first thing I did was to use the large wreath (or whatever it is) thinlit to cut a circle from my Old Olive panel. Not wanting this to be too plain, I used the Subtle Dynamic Textured Impressions Folder to dry emboss it. Perfect!

I then centered this over my Real Red mat and very lightly marked in pencil this circle on the panel. Using my grid paper I then marked the center and extended the marks out to the edge of the circle.

4

To line everything up perfectly I put the Layering Circles Framelit on my grid paper to mark the centers on it with a permanent marker the same way I had marked the paper circle. (Since there is no center in the die, the marks are across from each other, but centered, marking the quadrants) Next, I placed the Real Red panel with the marked circle on my grid paper again and put the marked thinlit on top, getting all the marks perfect, then used Post It tape to hold everything in place and ran it through the big shot.

This red mat was adhered behind my Old Olive wreath panel with Liquid Glue. Oh, I am liking this! Now we are ready for the artwork.

On a 4″ square of Whisper White I marked the center, then traced a pencil line around the wreath framelit to help me with placing the stamping. A Sponge Dauber and some Balmy Blue ink (mostly sponged off on my scratch paper before touching my Whisper White) give just the barest hint of sky. With Old Olive and Mossy Meadow I inked up the single conifer and the twin conifers from Rooted in Nature and began stamping. Some of the trees are full strength and some I just kept stamping without re-inking, staggering the placement. This gives the illusion of a forest with some trees further away.

1

I moved this square around until the stamped design pleased me within the cut out circle, then very lightly marked in pencil where it would be. This was my guide for using the large plain framelit in the Beautiful Baubles Bundle to trim my design to fit. Liquid Glue again does the adhering. This is my ‘go to’ adhesive.

One bit of advice: DON’T FORGET TO ERASE ALL PENCIL MARKS each step of the way! Do this before assembling. If you made very light marks, they are easy to erase with no telltale signs.

This 3-layered card front was then adhered to my Mossy Meadow card base, again with Liquid Glue.

For the sentiment, I used the words from Merry Christmas to All Bundle and stamped them in Mossy Meadow on Whisper White. Using the small banner die from Lakeside Thinlits I cut half of the sentiment, then turned the die around the cut the second half. I edged this with my Real Red Stampin’ Write Marker, stuck a few Mini Stampin’ Dimensionals on the back and adhered it to my card front.

1

For the inside, I stamped the sentiment from Merry Christmas to All in full strength Real Red and some more trees in Mossy Meadow, again both full strength and stamped off once or twice. Actually, I stamped the trees first so I would know where to put the sentiment.

It looked a bit plain, so I added three of the smaller red dots from the Santa’s Workshop Enamel Shapes. Done! This liner was adhered to a Real Red mat and into the card base with Liquid Glue.5

Hmm. Now the front looks plain. A bow! Of course, a bow.  I used the Real Red 3’8″ Mixed Satin Ribbon (Holiday Catalog page 6) and made a nice, small bow which was adhered with a Glue Dot.

Card finished! On with the envelope, as we can’t have naked envelopes.

A few more Mossy Meadow trees on the front and a pretty stamped Real Red bow on the flap is all this envelope needs to tie it to the card that will go inside. The bow is from the Wishing You Well stamp set.

I rather like this card, and might try another with a different scene, maybe different colors too. The die from Beautiful Baubles will lend itself to many styles.

Card cuts and products used are below, as is a place for you to leave a comment.

It’s Time to Sign Up For the November Holiday Paper Pumpkin!

The Paper Pumpkin team designed November’s kit to give you a solution for your holiday crafting needs!  So, now’s the time to get cozy this Christmas season with Paper Pumpkin, your One-Stop Box™ for holiday paper crafting fun.  When you subscribe by 10 November, we’ll send you our specially-designed box filled with everything you’ll need for a holly-jolly, handmade holiday.

  • The holidays are the best time to share our appreciation for others, and nothing does that like a handmade holiday card. November’s kit gives you everything you need to make plenty of those! (10 cards; 5 of 2 unique holiday designs.)
  • Coordinating colors for this kit: Cherry Cobbler, Crumb Cake, Garden Green, Gold, Soft Suede, Very Vanilla, Whisper White
  • HINT:  the box is a great sneak of what’s inside!

Remember, when you subscribe (or renew your subscription!) before 10 Nov, you’ll  get all of this PLUS an exclusive stamp set AND an ink spot for just $19.95.  And, that includes shipping!  If you’re currently a subscriber – just hang in there and you’ll see notice that your kit shipped after the 10th of November!

If you’re interested in subscribing to Paper Pumpkin, you can either sign up for a subscription where you’re billed monthly for your kit or you can purchase a prepaid subscription in my online store.

COMING SOON! Actually, on November 1

Let it snow! Or at least… create a snowy wonderland using this incredible assortment of products. With two stamp sets, paper, accessories, the only limit is your creativity!

This suite of snowy goodness is currently available only to Demonstrators (or…in a Starter Kit!) – but YOU can order it on or after November 1. However, be aware that this is only available until November 30, or while supplies last. That means that if the supply is sold out before November 30, that’s it. Done. Gone.

Host Code: EV7ETS99 good through the end of October.

Go here to learn the details on using the host code and my customer loyalty rewards program.

If you don’t have a demonstrator and need products or have questions, please contact me. Or if you would like a catalog, let me know.

CARD CUTS: Mossy Meadow: card base 5-1/2″ x  8-1/2″ scored at 4-1/4″; Real Red: front mat land inside mat 4″ x 5-1/4″; Old Olive: 3-7/8″ x 5-1/8″; Whisper White: tree scene 4″ x 4″, sentiment banner 1″ x 5″, inside liner 3-3/4″ x 5″.

Product List

Uncategorized

Stampin’ Up! see the forest with Winter Wood and Lovely as a Tree

Good morning Everyone. I hope you are off to a great weekend. Mine will be quiet for a change, and I rather enjoy that. It is a gloomy, rainy day, and perfect for curling up with a good book. What are you reading these days?

I received a box of Stampin’ Up! goodies last week, which I have not had time to even open until today. It was almost like Christmas. Of course, I had to use some of the new items, beginning with one of the stamps in Bokeh Dots, the one with stars.

4

This became the background for my forest. I stamped the stars on a Whisper White panel larger than I needed in stamped off once Night of Navy. Where the stamps overlapped, I put a tree to sort of camouflage the overlap. This tree is from Lovely As A Tree and is stamped in Old Olive, then stamped again without re-inking. I did this a couple more times, varying the height of the trees. I did one tree in Shaded Spruce, but I really don’t like that color with the Old Olive. However, it is staying. The more I look at it, the better I like it. There are MANY shades of green in a forest after all.

This card proceeded to design itself. All I did was cut and glue!

With Crumb Cake I stamped the bare trees in the Winter Woods set across the background, just for some dimension. The large conifer in Winter woods also was stamped a few times.

For the ground, I used the curved In The Woods Framelits die to cut some Whisper White pieces for snow banks. These were layered over the trees and adhered with Liquid Glue. I used a flat paintbrush to brush some Frost White Shimmer Paint over the ‘snow’ to make it glisten. I also randomly dabbed some of the Shimmer Paint on a couple of trees.

4

One of the Winter Woods conifers was stamped in Mossy Meadow on Mossy Meadow and cut with the coordinating die. This was adhered with Stampin’ Dimensionals. It looked a bit stark, so I added some ‘snow’ with the Frost White Shimmer Paint. Two of the small deer in Dashing Deer were stamped in Crumb Cake on Crumb Cake card stock and cut with coordinating dies. Stampin’ Dimensionals were used on them also. Had to use the minis on these little guys.

The sentiment is from Winter Woods, stamped in Mossy Meadow on Whisper White and cut with one of the ovals in Layering Ovals Framelits. The little sprig of spruce in the Lovely as a Tree stamp set made a perfect accent on the sentiment. Employing the marker to stamp method, Blackberry Bliss and Mossy Meadow Stampin’ Write Markers  were used to color the stamp.  I know there is a smear, and I will re-do the sentiment, but there was no time to do that before this post. That is what a drop of water will do to your creations!1

I cannot explain why the snow looks pink. It did not look that way on my computer before uploading the images.

This was mounted on a Blackberry Bliss scalloped oval, also cut with the Layering Ovals Framelits. Stampin’ Dimensionals were used to adhere this to the card front. The front was adhered to a Blackberry Bliss mat with Liquid Glue and onto the Shaded Spruce card base.

For the inside, a mat of Blackberry Bliss (from which I had cut the oval on the front) sets off the Whisper White sentiment panel. The sentiment is from Dashing Deer and stamped in Mossy Meadow. The same technique as for the accent on the front panel was used for the spruce springs in the corners. Liquid Glue was used to adhere both panels to the card base.

5

The envelope flap was a repeat of the card front and a single conifer from Winter Woods stamped in Mossy Meadow finishes the front of the envelope.

Products and card cuts are below, as well as a place to leave any comments you may have.

The host code for October is EV7ETS99. Go here for more information on how to use the host code for free stuff and the other ways to earn even more goodies.

I wish I had in my hands the new Snowflake Showcase stamps and dies as I would have used some of the snowflakes on this card. What is Snowflake Showcase you ask? Well, it is a lovely suite of products that you will want to get as they are not just for winter/Christmas. There are coordinating stamps for year round/all occasion use as well. This will be available for you to order on November 1-30 as long as supplies last. I will be sharing cards made with this suite next week.

To whet your appetite a bit, here are some images of this suite.

snowflake showcase       snowflake showcase 2

In the meantime, here is a short video showing what these products are and some ways to use them. Just click  Snowflake Showcase  to see it.

To celebrate World Card Making Day, which was Monday, Stampin’ Up! is discounting several items. These prices are good through tomorrow, so take advantage of them by clicking on the order online image at right.

world cardmaking day 2018

CARD CUTS: Shaded Spruce: card base 4-1/4″ x 11″ scored at 5-1/2″; Blackberry Bliss: front mat 4-1/8″ x 5-3/8″, inside mat 4″ x 5-1/4″; Whisper White: front 4-1/2″ x 6″ for stamping, then trimmed to 4″ x 5-1/4″, snow 3″ x 5-1/2″, sentiment 1-1/2″ x 2-1/2″, inside panel 3-3/4″ x 5″; Mossy Meadow: die cut tree 3″ x 4″; Crumb Cake: deer 2-1/2″ x 4″

Product List

Uncategorized

Stampin’ Up! Still Night Thank You

Stupendous Saturday Everyone! I hope your weekend is off to a great start. I am getting ready to go look for some birds in the next hour or so, but it is frosty this morning, so hope the birds are out and about!

Speaking of birds…my card for today is based on what I have to believe is my all time favorite stamp set. The Still Night Bundle is, oh, my gosh! There are no words for how wonderful this set is. I have made several cards with it and will do many more.

My inspiration for this card came when I was on the road home from the retreat. I was back in Iowa, where, despite what some think, is a beautiful state. Our sunsets will rival those anywhere. As I said, I was driving home, back in Iowa and this was the scene out my window. I quickly snapped this shot with my cell phone. No worries, I was on a side road and there was NO traffic. The only danger would have been driving off the road into the ditch. I didn’t.

1

It also fits with TGIF challenge #179

TGIF Challenge 179

At any rate, this served as my inspiration for today’s card. God is good, all the time, and this was an example of His goodness….the beauty of His creation. I give thanks for those moments. Here is my card.

4

The ink colors are not as vivid as the real sunset, but I didn’t want to make the card too dark. I am pleased with the way it turned out. So, how did I do it?

I began with a panel of Very Vanilla and my Stampin’ Sponges cut into sixths. (I have these labeled with a small piece of card stock to match the ink color. The card stock is stapled to the sponge, giving me a ‘handle’.) Using a strip of Post It Removable Labeling Tape to mark the horizon and mask off the ground, I began with the sky, sponging Balmy Blue over it all. Next, some Grapefruit Grove was added, then Pacific Point. I just kept layering color, adding a small amount of Highland Heather here and there until I was satisfied with the result.

I removed the tape and began sponging the lower portion with Mossy Meadow, sponging up into the sky a bit to blur the horizon line.

4

Winter Woods is another of my favorites from the Holiday Catalog. There is NOTHING to dislike about this bundle. (Remember, you save 10% when you purchase the stamps and dies as a bundle) The large conifer was stamped full strength first, extending up into the sky. I stamped another without re-inking, then a couple more shorter ones. Using the bare trees stamp, I stamped them in Soft Suede, after stamping off once.

I then added a few smaller conifers from the Rooted in Nature stamp set, placing them at random as though they might be in a real forest. This completes the background.

I used the branch die from Still Night Bundle to cut a branch from some Wood Textures DSP, then cut another using the branch die from the Seasonal Layers Thinlits. I dry fit these, then cut off one of the branches from the Still Night branch and added it below where I wanted the owl. These were then adhered to the background using Liquid Glue. I left the ends of the lower branch free to add some dimension.

1

The owl is stamped in Early Espresso on Soft Suede card stock and cut with the die from the Still Night Bundle. I colored his eyes with my Daffodil Delight Stampin’ Write marker, but it didn’t show up very well. With owls, the eyes have it, so what to do? I used my  Dark Daffodil Delight Stampin Blends Marker to color a couple of Clear Rhinestone Basic Jewels and attached them over his eyes.  My Basic Black Stampin’ Write Marker made a couple of dots for the irises, but they don’t show in the photo. Perfect! My finished owl was adhered over the Seasonal Layers branch with Stampin’ Dimensionals.

There are 4 pine bough dies in the Still Night Bundle, so I used all of them to cut some Mossy Meadow. These were Liquid glued to the branch.

To finish the front, I sponged a 1/2″ strip of Very Vanilla with Mossy Meadow. The sentiment is Soft Suede using a stamp from All Things Thanks. I snipped the end with my Paper Snips Scissors and adhered this also with Stampin’ Dimensionals.

The finished panel was attached to the card base with Liquid Glue.

For the inside, I used the same Mossy Meadow sponge I had used on the front, but did not add any ink to sponge around the edges of the liner. I stamped the sentiment in Soft Suede using another of the All Things Thanks stamps. The trees are stamped off once before stamping on my liner. Liquid Glue was used to adhere this into the card base.

5

The envelope simply has trees from Winter Woods on both the flap and the front. The flap is stamped full strength and the front is stamped off once. I hope you enjoy this card as much as I enjoyed making it. Please leave comments below.

Card Cuts are below, as are the products I used for this card.


Host Code: RKS93T47 (Good through the end of September) Use this code when ordering from my online store to get a free gift from me. There are also other goodies you can earn. Check it out here.


Don’t forget to check the Clearance Rack when you order. There are always great deals there. Click on the image below to see what is available.

clearance rack


Host a party with total sales (before taxes and shipping) of $250 and earn free Designer Series Paper in addition to the usual Stampin’ Up Rewards.

08.01.18_FLYER_DASHING_DEER_HOST_US


08-01-18_bonus-days_demo-main_en

AND DON’T FORGET TO REDEEM YOUR BONUS DAYS COUPONS. STAMPIN’ UP SENT THESE TO YOU VIA EMAIL AFTER YOUR AUGUST ORDERS OF $50 OR MORE. September 30 is the last day to be able to redeem them.

CARD CUTS: Very Vanilla: front 4-1/4″ x 5-1/2″, inside liner 3-3/4″ x 5″, front sentiment 1/2″ x 2-1/4″; Mossy Meadow: card base 5-1/2″ x 8-1/2″ scored at 4-1/4″, pine boughs scraps, or one piece 1″ x 4″; Wood Textures Designer Series Paper Stack: branches 6″ x 6″; Soft Suede: owl 2″ x 2-1/2″
Product List

Uncategorized

Stampin’ Up! Sneak Peek Still Night Sympathy

A Good Saturday to you all! And, Spectacular September! Yep, it is September already. Launch of Stampin’ Up! Holiday Catalog (Sept. 5th), Back-to-School, Colorful leaves, end of the garden, Football, Apples-and cider, YUM! It is also the beginning of preparedness for all the upcoming holidays-Labor Day, Halloween, Thanksgiving, Christmas, New Year. OH, MY! Will I ever be ready? I should have begun preparedness months ago!

Obviously, there will be many reasons to make and send cards, and that does not include the birthdays, get well, sympathy, etc.

My card today uses a stamp and die bundle from the Holiday catalog that I knew I MUST HAVE as soon as I saw it. The Still Night Bundle includes the Still Night Stamp Set and the Night Owl Thinlits. This set is special to me for several reasons, not the least of which, as a photographer I was privileged to observe and photograph a Great Horned Owl family this spring for several weeks.

wild wing creations-1

If I could only have 3 Bundles from the Holiday catalog they would be Still Night, Winter Woods and First Frost. All these can be used throughout the year for purposes other than specific holidays, which means my dollars go further. YAY!

But, I am sure you want to see how I made my card. I have not made an envelope for it yet….too many cucumbers to make into pickles, and tomatoes to can whole and diced, and as salsa, juice, and part of my end-of-the-garden soup mix. (Remember, I mentioned the end of the garden earlier in the post.) So, no envelope until I need to send this card. Oh, and did I mention that the inside isn’t finished either? I started the inside, but haven’t had time to finish it and get it in the card.

I really just wanted to give you a peek at this fabulous bundle before the catalog goes live on Wednesday.

wild wing creations-1

This card also uses my favorite Woodlands Textured Impressions Embossing Folder, Winter Woods stamps and Rooted in Nature stamps. I think they all combine wonderfully to make a great card.

I began with stamping a few of the wintry bare trees in Gray Granite on a panel of whisper white card stock which I then ran through the Big Shot in the Woodlands TIEF.

Using a Sponge Dauber I then highlighted the woodland embossed trees with Gray Granite. Since the trees I had stamped sort of looked like they were hanging in the air, I used the curvy die in the Winter Woods Bundle to cut a scrap of Whisper white to make a snowbank. This made a perfect way to ground the trees and provide a place for the sentiment from Rooted in Nature, stamped in Gray Granite.

wild wing creations-1

This panel was Liquid Glued onto my Mossy Meadow card base.

To add depth to the scene, I cut a square of whisper white, stamped a row of the bare winter trees in Gray Granite (after stamping them off twice) and some small conifers from the Rooted in Nature (annual catalog) stamp set. These were stamped off once, also in Gray Granite. I was going for a snowy evening look here, but I have other great ideas for this set, so stay tuned for more in upcoming posts.

I did a little Gray Granite sponging to take away the stark whiteness of the background, and am not totally happy with it. Do as you like here.

wild wing creations-1

Then I stamped off the large spruce tree from Winter Woods once in Mossy Meadow and stamped it as the tree closest to the owl. The backgrounds are finished. Now for the fun part, Ollie, the Owl himself. He is so handsome.

Ollie (my name for him) is stamped in Early Espresso on Crumb Cake card stock and colored with my Stampin’ Blends Markers. I used Bronze, Crumb Cake Light, Daffodil Delight Dark (eyes, bill and talons) and Smoky Slate Light. Using the outline die from the Still Night Bundle, and the magnetic platform for perfect placement of the die, I cut him out and applied Stampin’ Dimensionals to the back.

The tree branch, cut with the die from the same bundle, is cut from a panel of Wood Textures Designer Series Paper. I love this paper as it is SO very versatile. I just wish it came in larger sheets. A white Gel pen made the snow on the branch.

I did stamp some snowflakes allover the background panel and the square with Craft White and the stamps from Still Night, but they don’t show up at all.

Liquid glue the branch to the square stamped with trees and adhere the owl in place. Stampin’ Dimensionals were used to attach this art piece to the card front.

wild wing creations-1

The card front is done. Easy Peasy, and oh, so nice! Card cuts and product list below.

Thanks for stopping by. Don’t forget to leave a comment.

Host Code for September: RKS93T47

Please use this code for orders between $50 and $150 (before taxes and shipping) placed through my online store to earn free stuff and wild bird egg points for even more free stuff. Go to my rewards page to get the details. Request my free online tutorials for September with any order from my online store of over $50 (before t & s).

08-01-18_bonus-days_demo-main_en

All that ordering you did in August is about to PAY OFF!!  It’s time to start redeeming your Bonus Days Coupons!  Of course – you CAN wait until the 5th and redeem them on 2018 Holiday Catalog goodies! You will have received an email with your bonus codes.

Here’s the details:

  • Redemption Period Deadlines
    • September 30, 2018, by 11:50 PM (MT)
  • There is no limit to the number of coupon codes participants can use on an order during redemption.
  • Bonus Days coupon codes may be redeemed for any product (excluding Starter Kits, demonstrator supply items, and Paper Pumpkin subscriptions.)
    • New prepaid Paper Pumpkin codes MAY be discounted with Bonus Days coupon codes.
      • Bonus Days coupon codes may be redeemed one time only.

Stampin’ Up has a new host promotion called Dashing Along. See below for details, or contact me for more information.

08.01.18_FLYER_DASHING_DEER_HOST_US

So, go ahead and become a host for a Holiday catalog event and get this lovely paper, FREE.

Card Cuts: Mossy Meadow: 5-1/2″ x 8-1/2″ scored and folded at 4-1/4″; Whisper White: card front 4-1/8″ x 5-3/8″, square with trees 3-1/2″ x 3-1/2″, snow bank 1-1/2″ x 5-1/2″;  Crumb Cake: owl 2-1/2″ square, Woodland Textures DSP: branch 4″ x 4″

TAMS Start ———-> Product List

Uncategorized

Stampin’ Up! Waterfront for Happy Inkin’ Thursday Blog Hop

Blog hop header
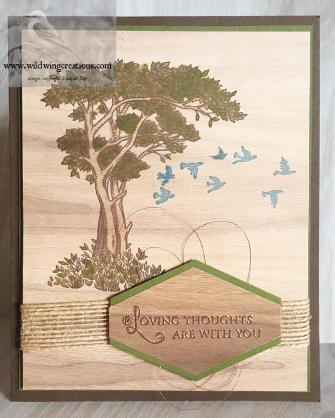
Good morning everyone! It is Thursday and that means it is Blog Hop day. I have been traveling more than I have been home. Because of that and the fact that part of the time involved being at workshops, I really didn’t have the time, nor the energy, to make cards and blog about them. Please forgive.

On with the hop. Today we have a color challenge:

July 26 color challenge

And here is what I created using those colors:wild wing creations-4

I began with a panel of Whisper White card stock and sponged the lower portion with Blueberry Bushel. I used the Stamping Sponge, cut into wedges to do the sponging, using a different wedge for each color. I actually went a little above the halfway mark, then switched to Gray Granite. This color only got a small slice across the middle, blending into the blue. The Mango Melody was sponged across the top, darker at the top and blending into the gray lower down.

My goal was a misty sort of sky with water below, or in front of, the mountains. Using the mountain, trees and sun (or moon?) as well as the ziggy stamp which I will call soil, from the Waterfront stamp set, I proceeded to stamp the elements. The Sun is Mango Melody, the mountains and trees are all done in Gray Granite. Some are stamped off once, some images I just kept stamping as long as there was ink. The closer elements are darker with the paler images further away. At least that is the intent.

wild wing creations-1

The soil is Blueberry Bushel as it is pretty much in the shadow of the mountains. I also used the water stamp from High Tide to make the ripples in the lake with Blueberry Bushel full strength. These were highlighted with my white Gel Pen.

The sentiment is also from Waterfront, as is the inside sentiment. Basically, that is it. This panel was Liquid Glued to the front of the card base.

On the inside I Liquid Glued a panel of Blueberry Bushel for a mat. The sentiment panel is VERY lightly sponged around the edge with Mango Melody. I just used whatever ink was left in the sponge from doing the front, adding no more ink. I only wanted to cut down on the extreme whiteness of the panel.

wild wing creations-6

With Gray Granite I stamped the soil across the bottom, then stamped many trees without re-inking, repeating this a couple of times. I stamped the sun in Mango Melody and the sentiment in Blueberry Bushel. Liquid glue adhered this to the Blueberry Bushel mat.

This card is for a friend who is going through a pretty rough patch, so on the opposite inside I stamped the sentiment from Artistically Asian.

wild wing creations-5

This was a quick, rather easy card with only the 3 colors of ink, 2 of the 3 colors of card stock, plus Whisper White card stock and a white gel pen.

For the envelope, I simply stamped some trees on the front in Gray Granite and VERY LIGHTLY sponged the flap in the three colors. Then, again just using Gray Granite, I stamped mountains and trees. Fini. End. Done.

Card cuts and products used are below.

Now that you have seen what I did with the challenge, just click the ‘next’ button to see what our very talented leader Amy, has done.

Blog hop next button

Or, if you prefer, just click on any name to go to her blog. I assure you, they are all great.

Amy Koenders

Shelagh Freemantle

Mary Deatherage

Kristi Gray

Jaimie Babarczy

Sue Prather

Karen Finkle

Julie Johnston – You Are Here

If you ever, EVER considered being a Stampin’ Up! demonstrator, NOW IS THE TIME to do it!! This deal is good through the end of July. Not only do you get to choose $125 worth of products for your starter kit for only $99, you also get 10 ink pads – free. That’s right, FREE. On top of all that, there is FREE shipping and absolutely NO obligation. If you want to remain a demonstrator in good standing, there is a $300 expenditure every quarter, but, seriously, is that a problem??

But wait! There is an added bonus. If you sign up now, you will get to order from the new Holiday Catalog after August 1. Customers cannot order until September. However, if you don’t WANT the ink pads, you can wait until August 1 and order all or part of your starter kit from the new catalog. Either way, it is a great deal.

Here are the ink pad collections from which you can choose; In Color 2017-2020, Brights, Subtles, Regals and Neutrals.

07.01.2018_FLYER_INK_PAD_US

Hostess Code for July: 32GXPH7A

Use the code above for customer rewards. For details, go here. And please leave comments below. Thanks for hopping with us today.

Don’t forget the BUY 3, GET ONE FREE sale on Designer Specialty Papers.07.01.18_FLYER_DSP_SALE_US(1)

Oh, and one more thing…Stampin’ Up! is offering 50% off the first month of a Paper Pumpkin subscription. This is a fun way to get new products. Just click on the image below to get started. Wow! Just one deal after another!! And they go away after next Tuesday, July 31.

paper pumpkin 50%

Card Cuts: Gray Granite: card base 5-1/2″ x 8-1/2″ scored at 4-1/4″; Whisper White: card front 4-1/4″ x 5-1/2″, inside liner 3-3/4″ x 5″; Blueberry Bushel: 4″ x 5-1/4″

Product List