Uncategorized

Best Catch Get Well

Good Tuesday Morning!

What a great spring day! Yesterday we had about 3 inches of rain and a huge thunderstorm. Today we are in a flash flood watch and supposed to get more rain…up to 2 inches more. We were getting pretty dry, but now we are good for awhile.

My card today is for a guy who had surgery yesterday. He is a fisherman, so hope he enjoys this card, as I don’t think he will be fishing for a few weeks. It was inspired by a post on the Ink It! Stamp It! Blog Hop by Carolina Evans.

4

I began with a Sahara Sand card base, and opted to make this a 5″ x 7″ card for better placement of the elements I wanted to use. I used the fisherman stamp in the Best Catch stamp set in Sahara Sand to make the background on the front of the card. Using a Sponge Dauber and some Sahara Sand ink I smudged the edges of the front of the card.

Next I stamped the creel and fly with the appropriate stamps on Soft Sea Foam card stock. I colored the stamps with my Calypso Coral and Sahara Sand Stampin’ Write Markers to get some color in the images, rather than stamp them in one color, then add another color. I did the same with the trout, then cut it out using the coordinating die.

The creel and fly were die cut with a Stitched Shapes Framelits square on the diagonal. These were adhered with Liquid Glue to a Wood Textures DSP scalloped square die cut with the scalloped Layering Squares Framelit. The Stitched Shapes Wood Textures DSP square was adhered to a Soft Sea Foam scalloped square with Liquid Glue. Onto this I adhered the trout with Stampin’ Dimensionals.

1

These squares I arranged over the front, adhering the fish square with Liquid Glue and the other two with Stampin’ Dimensionals. I really wanted more dimension, so I die cut three small fish with the appropriate die, colored them with the  Sahara Sand Stampin’ Write marker, and the Aqua Painter dipped in Calypso Coral ink, and strung them onto a length of Linen Thread, knotting it to keep them in place.  This was simply adhered under one of the Stampin’ Dimensionals on the back of the little square.

For the inside, I matted the Soft Sea Foam sentiment panel with a Wood Textures DSP mat on a Calypso Coral mat. The trout was stamped in Sahara Sand in the center of the panel, with the sentiment (from Divinity Designs, formerly Our Daily Bread stamps) above and below the fish, stamped in Soft Suede.

5

This completes the card. It was fun to do and really quite simple.

The ivory colored envelope has a fisherman in Sahara Sand on the front and a piece of the Wood Textures DSP on the flap.

CARD CUTS: Sahara Sand: 7″ x 10″ scored at 5″; Soft Sea Foam: for squares and 3 fish 2″ x 8-1/2″, trout 2-1/2″ x 2-1/2″, inside panel 3-3/4″ x 5-3/4″; Wood Textures Designer Series Paper 6″ x 6″ stack; for squares, 2″ x 7-1/2″, inside mat 4″ x 6″; Calypso Coral: inside mat 4-3/4″ x 6-3/4″.

Product List

Uncategorized

Stampin’ Up Waterfront masculine Card

Good Thursday morning Everyone! I haven’t posted much lately, and I truly don’t know where the time goes. It just flies right on by. Before you know it we will be thinking 4th of July patriotic events, parades and picnics. However, for today’s card I am playing along with three  challenges. They all fit in with a card I needed for my doctor who is retiring. I don’t know if he is a fisherman, but this card suggests it might be a good pastime for him.

The first one is Challenge # 218 Whatever the Weather on the Cardz 4 Guys Blog.

cards for guyz

The second challenge is  a sketch challenge from Try Stampin’ on Tuesday. For this one you can use either the colors or the sketch, but I chose the sketch since I was doing a masculine card, and turned it on its side.

april mix up 404

The third challenge is from Stinkin’ Inkers and is “Lovely as a Tree”.  The requirement is to use a tree on the card. I used several!Stinkin' Inkers Header

Here is the card I created.1

I began with a card base of Blueberry Bushel and ran it through the Big Shot with the Subtle Dynamic Textured Embossing Folder.  A strip of Wood Textures DSP was Liquid Glued in the center.

For the art piece, I used the largest Stitched Shapes circle die and cut it from Very Vanilla. Using the Waterfront stamp set, I stamped the water in Pacific Point and Balmy Blue, stamping off once on some of the images and full strength on the rest.

With Smoky Slate and the single ‘land’ stamp, I stamped the shorline, then stamped a second time on an angle to make it more realistic.

Next are the trees, as per the Stinkin’ Inkers Challenge. These were stamped in Mossy Meadow on the right, using the complete tree stamp from Waterfront. Inking only the top half of the stamp, I stamped over the first image to create a forest. Moving to the left side, I repeated, inking only the top of the stamp.

2

For the sky, I sponged some Balmy Blue, Highland Heather and Smoky Slate very lightly. Then I went back over some of the sky with Highland Heather, trying for a sort of stripe effect to look like rain coming down. This was not too successful, but, no matter.

The clouds are actually the exhaust stamp from Geared Up Garage, stamped off once, then rotated and stamped again a couple of times. I think this fulfills the requirements of the Cardz 4 Guys challenge of weather. Fishing is often best when the weather is not the best.

The fisherman was stamped in Memento Tuxedo Black. I then colored in his face and hands with my Petal Pink Stampin’ Write Marker. His hat was colored with the Crumb Cake marker and his clothes with Crumb Cake, Mossy Meadow and Smoky Slate. I wanted a camouflage look, but you can’t really see that.

This circle was adhered to the card front with Stampin’ Dimensionals. To finish, I used my Basic Black Stampin’ Write Marker to ink the rest of the fishing line on the card front, and Memento Tuxedo Black to ink the sentiment in the lower left corner.

1

For the inside, I used more of the Wood Textures DSP as a mat, and a panel of Balmy Blue, run through the Big Shot with the second largest Stitched Rectangles Framelits die, for the sentiment. The sentiment, from Colorful Seasons, as is the one on the card front, was stamped in Memento Tuxedo Black, using my Stamparatus. I wanted the sentiment to be dark, and using the Stamparatus allowed me to stamp it a second time.

5

The trout is stamped in Smoky slate and left as an outline image.

The Very Vanilla Medium Envelope flap has more of the Wood Textures DSP, and another outlined fisherman on the front, stamped in Smokey slate.

I think this is a nice card for any man, and I hope the newly retired Doctor likes it. I will write a personal note as well.

Thank you for stopping by. Leave comments below, and be sure to check the retiring list in case there is something there that you want to get before it is gone.  Just click here to see what will be gone at the end of May.

The new annual catalog will be ready for you to order goodies on June 4. If you do not have a demonstrator and would like a catalog, please let me know.

CARD CUTS: Blueberry Bushel: card base 5-1/2″ x 8-1/2″, scored at 4-1/4″; Wood Textures Designer Series Paper stack: center strip on front 1-3/4″ x 5-1/2″, inside mat 4″ x 5-1/4″, envelope flap 2-1/2″ x 6″; Balmy Blue: inside liner 4″ x 5″; Very Vanilla: to cut circle 3-1/2″ x 3-1/2″ or larger.
Product List

Uncategorized

Easter Sunday-the Resurrection of Jesus

Good Sunday morning to you! And, Happy Easter. It isn’t about the bunny, you know, it is about the Lamb. For you who may not know, Jesus is the Lamb, pure and blameless, sacrificed for MY sins and Yours.

However, He rose again. Death could not hold him. For He is God himself.

Here is the resurrection story from Luke 24.

Luke 24 New International Version (NIV)

Jesus Has Risen

24 On the first day of the week, very early in the morning, the women took the spices they had prepared and went to the tomb. They found the stone rolled away from the tomb, but when they entered, they did not find the body of the Lord Jesus. While they were wondering about this, suddenly two men in clothes that gleamed like lightning stood beside them. In their fright the women bowed down with their faces to the ground, but the men said to them, “Why do you look for the living among the dead? He is not here; he has risen! Remember how he told you, while he was still with you in Galilee: ‘The Son of Man must be delivered over to the hands of sinners, be crucified and on the third day be raised again.’ Then they remembered his words.

When they came back from the tomb, they told all these things to the Eleven and to all the others. 10 It was Mary Magdalene, Joanna, Mary the mother of James, and the others with them who told this to the apostles. 11 But they did not believe the women, because their words seemed to them like nonsense. 12 Peter, however, got up and ran to the tomb. Bending over, he saw the strips of linen lying by themselves, and he went away, wondering to himself what had happened.

On the Road to Emmaus

13 Now that same day two of them were going to a village called Emmaus, about seven miles[a] from Jerusalem. 14 They were talking with each other about everything that had happened. 15 As they talked and discussed these things with each other, Jesus himself came up and walked along with them; 16 but they were kept from recognizing him.

17 He asked them, “What are you discussing together as you walk along?”

They stood still, their faces downcast. 18 One of them, named Cleopas, asked him, “Are you the only one visiting Jerusalem who does not know the things that have happened there in these days?”

19 “What things?” he asked.

“About Jesus of Nazareth,” they replied. “He was a prophet, powerful in word and deed before God and all the people. 20 The chief priests and our rulers handed him over to be sentenced to death, and they crucified him; 21 but we had hoped that he was the one who was going to redeem Israel. And what is more, it is the third day since all this took place. 22 In addition, some of our women amazed us. They went to the tomb early this morning 23 but didn’t find his body. They came and told us that they had seen a vision of angels, who said he was alive. 24 Then some of our companions went to the tomb and found it just as the women had said, but they did not see Jesus.”

25 He said to them, “How foolish you are, and how slow to believe all that the prophets have spoken! 26 Did not the Messiah have to suffer these things and then enter his glory?” 27 And beginning with Moses and all the Prophets, he explained to them what was said in all the Scriptures concerning himself.

28 As they approached the village to which they were going, Jesus continued on as if he were going farther. 29 But they urged him strongly, “Stay with us, for it is nearly evening; the day is almost over.” So he went in to stay with them.

30 When he was at the table with them, he took bread, gave thanks, broke it and began to give it to them. 31 Then their eyes were opened and they recognized him, and he disappeared from their sight. 32 They asked each other, “Were not our hearts burning within us while he talked with us on the road and opened the Scriptures to us?”

33 They got up and returned at once to Jerusalem. There they found the Eleven and those with them, assembled together 34 and saying, “It is true! The Lord has risen and has appeared to Simon.” 35 Then the two told what had happened on the way, and how Jesus was recognized by them when he broke the bread.

Jesus Appears to the Disciples

36 While they were still talking about this, Jesus himself stood among them and said to them, “Peace be with you.”

37 They were startled and frightened, thinking they saw a ghost. 38 He said to them, “Why are you troubled, and why do doubts rise in your minds? 39 Look at my hands and my feet. It is I myself! Touch me and see; a ghost does not have flesh and bones, as you see I have.”

40 When he had said this, he showed them his hands and feet. 41 And while they still did not believe it because of joy and amazement, he asked them, “Do you have anything here to eat?” 42 They gave him a piece of broiled fish, 43 and he took it and ate it in their presence.

44 He said to them, “This is what I told you while I was still with you: Everything must be fulfilled that is written about me in the Law of Moses, the Prophets and the Psalms.”

45 Then he opened their minds so they could understand the Scriptures. 46 He told them, “This is what is written: The Messiah will suffer and rise from the dead on the third day, 47 and repentance for the forgiveness of sins will be preached in his name to all nations, beginning at Jerusalem. 48 You are witnesses of these things. 49 I am going to send you what my Father has promised; but stay in the city until you have been clothed with power from on high.”

The Ascension of Jesus

50 When he had led them out to the vicinity of Bethany, he lifted up his hands and blessed them. 51 While he was blessing them, he left them and was taken up into heaven. 52 Then they worshiped him and returned to Jerusalem with great joy. 53 And they stayed continually at the temple, praising God.

Happy-Easter


Uncategorized

Stampin’ Up! retirement list now available

Good Afternoon everyone! At least I hope it is a good afternoon for you. I know, it is Monday, but still….

I have been on the run today so just now had a chance to look at the list of retiring items. A lot are being retired, some to my dismay. That said, the new catalog has some great looking items in it, so don’t despair. If you want any of the retiring items, they will only be available as long as supplies last, so don’t wait until June 3 to order, hoping that you will still be able to get whatever you want. Maybe, maybe not.

As promised, Stampin’ UP! has released the 2019 Occasions and 2018-2019 Annual Catalog Retiring Products List!

Here are the Details:

Promotion Dates: April 15–June 3, 2019

  • There is no minimum purchase required to participate in this promotion.
  • Retiring items may be added to any order
  • All retiring items are only available while supplies last and will be discontinued after June 3.
  • Due to high demand for retiring stamp sets, these items will have guaranteed availability until May 24; all other products are not guaranteed and are available while supplies last only.
  • Retiring items are eligible for Stampin’ Rewards with qualifying orders.
  • Retiring host sets may be purchased using Stampin’ Rewards from a qualifying party only.
  • Depending on inventory levels, discounts on select products may be introduced on or after May 9.
    • These discounts will not be preannounced.
    • Discounts may vary by market depending on inventory levels.
    • If you buy a product at retail price and then it is later discounted, Stampin’ Up! will not refund the difference.
    • If there is a product you want, we recommend buying it right away and not waiting to see if it’s discounted later or you risk it being sold out!
    • If you start an order before a discount is announced, the order will not include the discounted pricing. If you want to order a product that has been discounted, you will need to start the order after the discounts are announced.

Just click on the shop with me online button at right to go to my online store to see all the retiring items. Or, click here to go there. Easy Peasy! Click here for the pdf retiring list from the annual catalog, or here for the pdf retiring list from the occasions catalog.

Please note, some of the bundle items may be carrying over into the new 2019-2020 Annual Catalog.  However, the bundle pricing will go away, so get them while you can at the discounted price!!

Happy Shopping!

Uncategorized

Stampin’ Up! Changes coming!

No card today. I wanted to bring you some news from Stampin’ Up! so that you’ll be on the cutting edge of “in-the-know”!  As you’re aware, we’re headed into the transition time between catalogs.  So…we’re anticipating the arrival of the 2019-2020 Retiring List – watch for it on 15 April (that’s next Monday!).

We’re also going to see some changes to our product lines!  Though change is hard, I know these are going to be for the better!

Here’s what we know!

Big News!!  Stampin’ Up! has just announced that they’ll be transitioning to a new manufacturer for their dies and embossing folders moving forward!

Stampin’ Up! is moving to a direct-to-manufacturer relationship.  This means they’ll work directly with the factories who manufacture their dies and folders instead of working with another company who then works with different factories (so – eliminating the middle-man!).  This gives them greater control and potential in the manufacturing process.  Always a GOOD thing!

TRANSITION TO NEW DIE-CUTTING AND EMBOSSING LINE

Here’s a look at how this transition will unfold

HIGHLIGHTS: NEW-STYLE DIES AND EMBOSSING FOLDERS

Since Stampin’ Up! is using a new supplier for their dies and embossing folders, they’ll be manufactured differently, which means the way you use them will be a little different.  A few of the changes between the old-style and new-style products are listed below.  In the future, Stampin’ Up! will also provide videos to show how to craft with the new-style dies and embossing folders and better showcase the features described below.

Here are some of the changes you’ll notice with our new-style dies and embossing folders:

  • The new-style open dies (those that coordinate with stamps) use a high quality metal that’s thinner than before but still as strong and durable.
  • The new-style dies have an added lip to the inside of the blades.
  • On old-style dies, when you place an open die (dies that coordinate with stamps) over a stamped image, a small border of cardstock is visible around the stamped image.  With new-style dies, the die hugs the edge of the stamped image.  Instead of aligning the die to the space around the stamped image, you will align it to the edges of the stamped image.  When the image is cut, there will still be a cardstock border around the image.

OLD STYLE ALIGNMENT

2019_DIE_COMPARISON__1
2019_DIE_COMPARISON__3

NEW STYLE ALIGNMENT

2019_DIE_COMPARISON__2
2019_DIE_COMPARISON__4
  • They’ve improved the adhesive that secures the dies to the insert sheet in the package so that it’s not too sticky.  It’s easier to remove dies from the insert sheet, and the adhesive won’t cling to the dies.  Thank goodness!!  BEST.  CHANGE.  EVER!
  • They’ve standardized the size of the die inserts for easier storage.  There are now only two insert sizes: 5″ x 7″ (12.7 x 17.8 cm), which coordinate in size with the stamp cases, and 6″ x 6″ (15.2 x 15.2 cm).  The standard sizes will allow uniform storage in whatever system you use.  The envelopes that the dies come in will be slightly larger.
  • With old-style Dynamic folders, they recommended that you spritz cardstock before embossing to soften the fibers so you got a better impression.  Now, that extra step will not be necessary because the new-style folders usually create a crisp impression without spritzing.  The way the new folders are manufactured also gives options for more detailed and intricate designs in the future.
  • 3D folders are thinner than the old-style Dynamic folders.  Because they’re thinner, you may need to use a shim, depending on the die-cutting & embossing machine you use.


Stampin’ Trimmer Discontinuation

Stampin’ Up! will be retiring the Stampin’ Trimmer as of 3 June 2019, including all accessories—replacement cutting blades, scoring blades, and cutting mats.  As most of you know, they’ve experienced challenges with their supplier and are taking the opportunity to research and explore a replacement option for this product, which won’t be the same as the current Stampin’ Trimmer.  There’ll be a gap in time between when the current Stampin’ Trimmer retires and when a new product becomes available, but they do not currently have an estimated timeframe.

While the replacement cutting blades will also retire with the trimmer and will not be featured in the annual catalog, Stampin’ Up! has ordered what would normally be six months of inventory based on recent historical patterns to help customers during this transition away from the current trimmer.  But please know that this news could cause faster inventory depletion. 😳

  • When the retiring list goes live on 15 April, the order limit for the blades will increase from three to six (and the limit will remain at six until they’re no longer available).
  • From now until September, intermittent shipments of blades will be received from the supplier. Throughout these months, Stampin’ Up! anticipates times when the blades will not be orderable (and not offered as a backorder). During those downtimes, you will have the option to enter an email address to receive notification when the blades are available again.

While change is usually difficult, remember that most likely these will be changes for the better. Stay tuned for more information as it unfolds.

Your comments are welcome.


Uncategorized

Stampin’ Up! Wonderful Romance for Amy’s Inkin’ Krew Team Blog Hop

inkin-krew-blog-hop-banner2

Good Morning All!

We have had a couple of very spring like days, with high temperatures around 70 degrees and a GEN-U-WINE summer thunderstorm. Wow! I had forgotten just how powerful they are. The best thing was on Sunday. I saw a rainbow in the WEST going to church, and then in the evening we had a thunderstorm followed by a gorgeous, brilliant rainbow in the east. I don’t believe I have ever seen two rainbows on the same day, and in opposite directions! Spectacular. Thank you, Lord, for such beauty and hope.

Now, on with the hop. Our theme for today’s hop is ‘feminine’, which we are free to interpret any way we choose. I chose to use the Wonderful Romance Bundle and Wonderful Romance Designer Series Paper, as well as Petal Pink. All together, those say ‘feminine’ to me.

Here is my card.

4

I began by using Petal Pink for my card base, and used the border leaf design on an angle to cut the front of the card.

On the inside, I used Liquid Glue to attach the lacy vellum paper from Floral Romance Designer Series Paper so it would show under the die cut front.

5

For the inside sentiment, I marked the angle on Whisper White card stock with a light pencil mark, then cut from mark to mark. I then cut it to 5-3/8″ and used Liquid Glue again to adhere it to the inside of the card. The sentiments are stamped in Fresh Fig using sentiments from Dear Doily.

Now, back to the front of the card. I stamped the large floral image from Wonderful Romance in Smoky Slate on Whisper White card stock, then colored it with Old Olive, Pear Pzazz, Petal Pink and Fresh Fig Stampin’ Write Markers. I was going to use Stampin’ Blends, but didn’t have the correct colors.

1

This image was then die cut with the coordinating die that is part of the bundle. The Wonderful Romance sentiment was stamped in Fresh Fig on Whisper White card stock and cut with the Wonderful Floral die, also part of the bundle.

There is a tiny flower in that stamp set, so I inked it up with Petal Pink and stamped it next to the sentiment. This sentiment panel was attached with Stampin’ Dimensionals, as was the floral piece. A few Pearl Basic Jewels complete the front.

The envelope front was stamped with the large floral image in Smoky slate and colored the same as for the front of the card. I deliberately stamped some of the image off the edge.

2

The flap has more of the lacy vellum Floral Romance Designer Series Paper. It does look different on Whisper White than on Petal Pink.

3

I think this card fulfills the parameters of the challenge theme and I hope you like my card. Please leave comments below.

Now, to see what Shirley Gentry has for you, click the ‘previous’ button, or to move forward and see Terry Lynn Bright’s creation, click the ‘next’ button. Of course, you all know you can click on any name to just go to her blog. Enjoy!

inkin-krew-blog-hop-previous2inkin-krew-blog-hop-next2

  1. Mary Deatherage
  2. Julie Johnston: You Are Here

CARD CUTS: Petal Pink: card base 5-1/2″ x 4-1/4″; Whisper White: inside sentiment panel 3-1/2″ x 5-3/8″, front sentiment 2-1/2″ x 3″, large floral piece 4″ x 4″; Floral Romance Designer Series Paper vellum lace: inside liner 4-1/4″ x 5-1/2″, envelope flap 2-1/2″ x 6″

Product List

Uncategorized

Stampin’ Up! Beauty Abounds Get Well

Good Thursday again Everyone.  Time again for Amy’s Inkin’ Krew Blog Hop. Our challenge this week is color, and boy, is it a challenge for me!

These are NOT my favorite colors and one of them is my most disliked color in the world! However, I think I am up to this challenge, so here goes.

I began with a Grapefruit Grove card base. Actually, this was an easier challenge than I thought it would be, thanks in part to Stampin’ Up! coordinated Designer Series Papers and a card I made previously. I made that one thanks to Jan B, an independent SU demonstrator in the United Kingdom. If you want to watch her video, just click HERE

She gives all the details, so I will not reinvent the wheel. However, I have made this card before, so HERE   or HERE are the links for my cards.

Here is my card for today:4
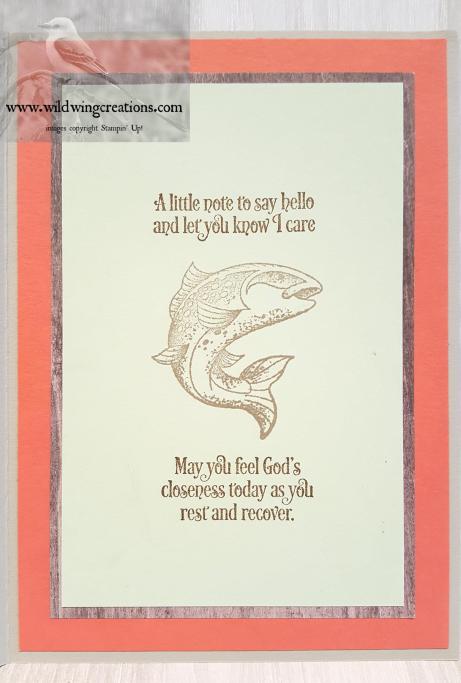
It is NOT a difficult card, you just need to be aware of the cutting. Card Cuts are below.

I began with the card base in Grapefruit Grove, then added Whisper White, Gingham Gala and some butterflies punched from the Botanical butterflies. This paper is no longer available, but any thing will do. I have used giraffes instead of butterflies. Or, you may have a butterfly stamp you can use.

Liquid Glue was used throughout to adhere all the bits except the floral and sentiment panels.1

Beauty Abounds is the Stamp set used for the floral art piece, and Flourishing Phrases for the sentiment.5

Cut the pieces, then assemble the pieces (Gingham Gala to Whisper White. Score the card base and mark and cut the card base as directed HERE. Adhere the panels to the card base.

Stamp the floral piece and the sentiment with Memento Tuxedo Black. Color the flowers with Grapefruit Grove and Lemon Lime Twist Stampin’ Write Markers. Die cut with Stitched Rectangles. Adhere to Grapefruit Grove mats with Liquid glue and to the card base with Stampin’ Dimensionals.

6

Cut the windows with the Stained Glass Thinlits and adhere to the proper panel. I used Liquid Glue, but you could use Multipurpose Adhesive Sheets on the back of the Whisper White before die cutting.

Punch out with the Duet Butterfly Punch, or fussy cut, your butterflies and adhere the bodies only, leaving the wings free. I centered the large ones under the fold. Stamp the antennae with Memento Tuxedo Black.

I used more of the Gingham Gala paper on the envelope flap and a couple of butterflies on the front.3

2

This is an easy, lovely card. Please try one using whatever elements you desire.

Amy Koenders

Shelagh Freemantle

Mary Deatherage

Kristi Gray

Jaimie Babarczy

Sue Prather

Karen Finkle

Julie Johnston

Eva Dobilas

CARD CUTS: Grapefruit Grove: card base 6″ x 10″ (refer to my link for scoring and cutting instructions), floral mat 1-3/4″ x 3-3/4″, sentiment mat 1-3/8″ x 1-7/8″; Whisper White: 2-3/8″ x 5-7/8″, 1-3/8″ x -7/8″, 2-7/8″ x 5-7/8″, 6 pieces 1-1/8″ x 1-3/8″, floral piece approx 2″ x 4″, sentiment approx 1-1/2″x 2″, windows 1-1/2″ x 5-1/2″; Gingham Gala 6″ x 6″ Designer Series Paper Pack: 2-1/4″ x 5-3/4″, 1-1/4″ x 5-3/4″, 2-3/4″ x 5-3/4″, 6 pieces 1″ x 1-1/4″; Botanical Butterflies Designer Series Paper: 3 large butterflies and 6 small ones. (Or design of your choice, flowers, trees, animals, etc)

Product List

Uncategorized

Stampin’ Up! Happy 13th Birthday Eclipse

Today is supposed to be chilly and sunny, a perfect prescription for Spring. My crocus are blooming and the tulips are poking through the leaves I have not yet raked. They won’t get done today either as I have an all day meeting to attend. Ah, well!

5

Today’s card is also of the masculine kind, albeit for a 13 year old. This is a VERY special birthday…becoming a teen. Then, they can’t wait to be 16 so they can get a driver’s license. And so it goes. We all remember, don’t we??

I started with a Bermuda Bay card base and added a Calypso Coral mat. I wanted it to be bright and not at all feminine, so about the only Designer Series Paper I have on hand is the Bubbles and Fizz, now retired. I used this for the Eclipse part of the card. I am sure you have something in your stash that will work just as well.

1

Using the now retired Large Numbers Framelits, I cut out 4 of each number in Calypso Coral and one of each from the Bubbles and Fizz. These were stacked and glued together with Liquid Glue. I then used Liquid Glue to adhere the Bubbles and Fizz card front to the Calypso Coral mat, and glued the numbers in their spot.

4

The Happy Birthday Thinlits cut in Calypso Coral and cut apart (the two words are connected) were glued to the left of the numbers. This makes a rather busy, but bright and cheerful card.

On the inside I glued a mat of Calypso Coral topped with another mat of Bubbles and Fizz. Liquid Glue was use throughout this card…no dimensionals!

For the liner, I stamped the two sentiments from Happy Birthday Gorgeous in Bermuda Bay. The balloons are also from that stamp set and are stamped in Daffodil Delight, Bermuda Bay and Calypso Coral. I made a mask and used it to make the balloons appear as a bunch without overlapping the colors.

6

The balloon strings and candles are from the Birthday Backgrounds stamp set. There are several balloon strings  on the stamp, so I chose which I wanted to use, then colored it with my Stampin’ Write Markers to match the balloon.

The candles (all thirteen of them) were colored with my Calypso Coral Stampin’ Write Marker and the flames in Daffodil Delight. I ‘huffed’ on these to moisten the ink, then stamped them across the bottom of the liner. There are only 9 on the stamp, so I repeated the process for 4 more to make 13 candles.

To finish this panel, I used my Bermuda Bay Stampin’ Write Marker to make ‘stitch’ lines around the edge.

I think this is a card a teen will like..not too fussy and sort of fun. This is a bit outside my comfort zone as I don’t usually make bright colored cards. But, for a change, it was fun.

The envelope (you guessed it!) has more of the Bubble and Fizz DSP on the flap. I stamped more balloons on the front and just drew in the strings with my Stampin’ Write Markers. I did this because I had already cleaned my stamp and didn’t want to do it again. Call me lazy!

3

2

Thanks for stopping by. Don’t forget to leave a comment.

CARD CUTS: Bermuda Bay: card base 5-1/2″ x 8-1/2″ scored at 4-1/4″; Calypso Coral: (cut 2) inside and front mats 4-1/8″ x 5-3/8″, happy birthday 3-1/2″ x 4″; Whisper White: inside Liner 3-1/2″ x 4-3/4″; Bubbles and Fizz Designer Series Paper: (cut2) front and inside mat 4″ x 5-1/4″, envelope flap 2-1/4″ x 6″

Product List