Uncategorized

This is the day that the Lord has made…

And I am rejoicing and glad in it! Before you go further, if you are expecting a paper craft, forget it! This is much bigger than anything you or I could create…THE CREATOR did this, and it is spectacular!

Today’s blog is about one of, if not THE most awesome, magnificent sights I have ever in my life seen. I will post several photos, in order. Here is the first one.

wild wing creations-2

I was on my computer yesterday evening, about 5:30 or so when a neighbor (Thanks TOM) stopped by to tell me there were thousands of Snow Geese just up the road in a field. He knew my next words would be: “Thanks! I’ll grab my camera!”

Well! If you know me at all, you know that was a call to action. I grabbed my jacket, camera and slipped on some shoes and out the door I went. This image was the first I took, at around 5:38. I could hardly believe my eyes! Thousands of geese in the air, and I hadn’t even looked at the ground yet. I don’t have a clue as to how you can estimate the numbers of birds, and with my 200 mm lens there was no way to get them all in one frame, or even 2 or 3.

I drove about 1/2 mile to the intersection and turned left where I could see them in the sky. Looking north I could see snow on the ground….snow GEESE, not the cold, white stuff from which to make snowmen. This shows most of the span of a 40 acre field from about 3/4 mile away. AMAZING sight. There may have been some other geese mixed in, but the ones I was close enough to identify were Snow Geese, both adult and immature. Isn’t that amazing?? And I am MILES from any water other than a couple of small farm ponds.wild wing creations-12


I was awestruck with the beauty and the choreography of these birds. How so many can be in the air and never fly into one another is amazing in itself. I so much wanted to drive into the field and get closer, but, though the ground is frozen, we had some rain over the weekend that made it slippery (we call it greasy) on top, so I knew that would be foolhardy. It was tough to do, but I stayed on the road.

I drove faster than I have ever driven on a gravel road back to the corner, made a left and gunned it up to the highway. Making another left turn, I drove about a 1/2 mile to come even with where they were on the south side of the highway. These are the same birds as in the photo above, but from the opposite direction. They seem to have an uncanny sense to land in the middle of a square mile, not close to where you can get a good look at them. Thank goodness for a long lens, in this case 500mm.

wild wing creations-4

As I watched, enthralled, they were, how to say it…milling about? Flying about? I don’t know. It seemed they didn’t know whether to land or keep going. Some of them did land, then took off again and flew north over the highway to land in another field.  I watched them here for a bit, and it was almost like watching a tennis match, swiveling my head (and camera) from north to south to capture as much of this spectacle as possible, both in my mind and with the camera.wild wing creations-5

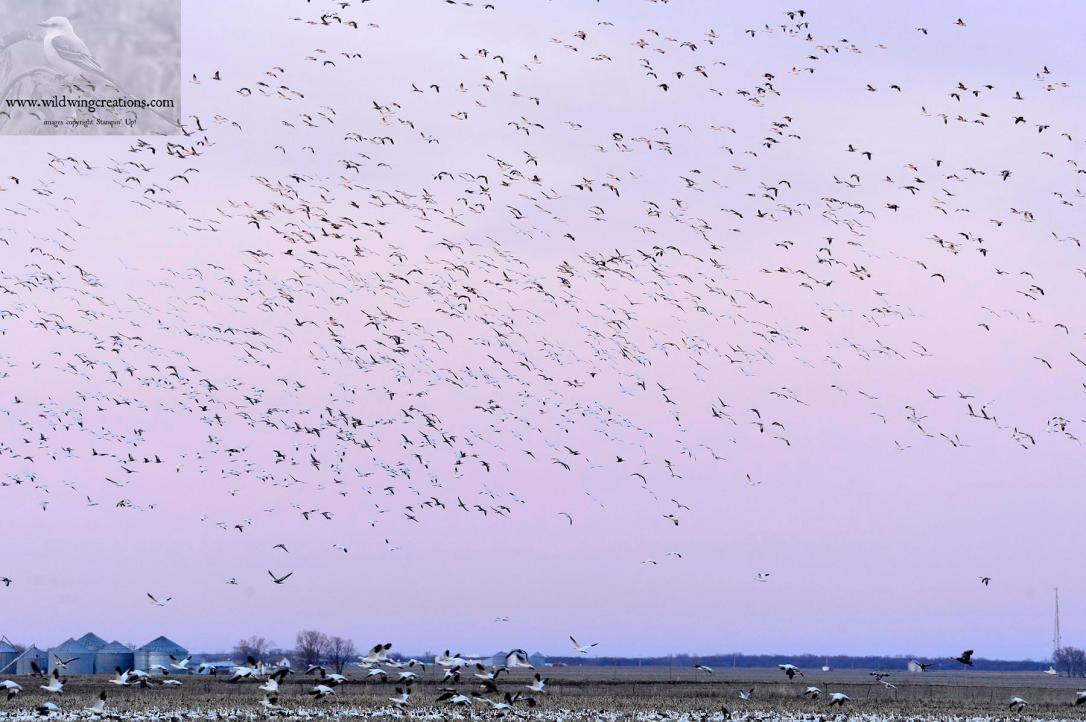
This next image is on the north side of the highway as they landed. wild wing creations-6

Simply amazing. My heart swelled and my eyes welled up with the sheer beauty of it all. These birds have many, many miles to go to their breeding grounds in northern Canada, and beyond, well into the Arctic Circle. Basically, they fly to the top of the world to make their nests and raise their young, then fly back south to the southern United States and into Mexico for the winter.

Snow Geese mate for life, and many of the geese in these swirling clouds of feathered fowl were immature, probably traveling with their parents to the nesting grounds, where they will take a mate if they haven’t already done so. This image is of another wave coming in for a landing on the north side of the highway. wild wing creations-7

I turned around and looked to the west to see how low the sun was getting, and saw this cloud approaching. Still more geese!  WOW! wild wing creations-8

They just kept coming…wave after wave of swirling, dipping, dropping, ascending birds. l quickly made some camera adjustments to allow for the dwindling light, and looked back to the field on the south side of the highway. WHOA! A huge group of them took flight and headed directly toward my house!

wild wing creations-9

On the lower right are a couple of grain bins and a green roofed building. That is my place and they were apparently going to pay me a visit. I watched for a few moments, and it sure seemed they were headed that way. What to do? Stay and watch the north side of the road, or head toward home. Maybe my yard will look like it snowed!

The sun just slipped below the horizon, so I figured I better head home and see where they were planning to roost before the light was completely gone. I was 2 miles from the house, so by the time I got there, many of them (most) had landed. They were behind my house, about 1/4 mile away. This was the scene as I stood in my backyard.

wild wing creations-10

It is to dark to see  clearly, but, left of center the ground was tinged gray, as it was covered in snow geese. The cacophony was incredible. I used my phone to capture the sound of both their honking and the underlying hum of their wing beats. By now I am on sensory overload!

Before I went to bed I opened the window and I could still hear them ‘talking’ among themselves. At 3:15 when I awoke, I again checked and, sure enough, I could still hear them, though they were much quieter. Apparently they do sleep, but not all at the same time.

At 5:30 I got up, opened the window and I could still hear them, though they seemed to be further to the north and west and not directly behind the house.

By 5:50 I was in my car and driving to see if I could see them, using my binoculars. Yes! They were about 1/4 mile to the north of where they settled last night and further west. As the sky lightened, I could see more flying in from the east, looking more like a swarm of gnats than birds in flight. As they got closer, it appeared they would land with the others.

By now, a couple of friends had arrive to see this spectacle of which I had told them last night. We watched the new group land, then drove on up the road and around the corner to see if we could get any closer, as it seemed they would be only about 1/4 mile from that road. In my neck of the woods, roads are laid out in a 1 mile grid. The land is pretty flat, well, very flat, but with a few little dips it might not be possible to see something as small as a goose, even thousands of them.

But yes, there they were. We waited for them to take flight, and saw another wave, and another arriving, to fly on past us to their next destination. The sky looked like this for about an hour. There are no words to describe this.wild wing creations-1

Where we stood, we could see clouds of them coming from the east and south, not quite a 180 degree view, but for sure 140 degrees of the sky was filled with these masses of birds. There had to be several hundred thousand of them if not a million.

At last, some of them decided it was time to move on. wild wing creations-13wild wing creations-1

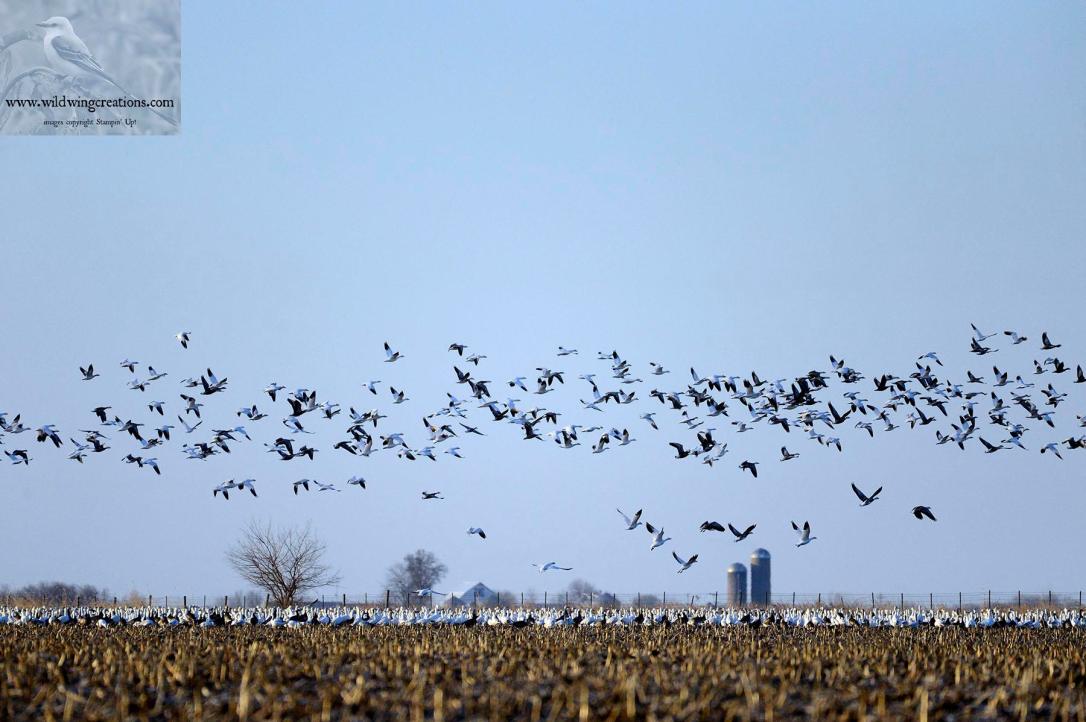
As they lifted off, I thought that all of them would go, but it was a few more minutes before the rest lifted off and headed toward their final destination. Before they left, they flew directly overhead as though to say, “Good-bye.”wild wing creations-11

A few of the stragglers.wild wing creations-2

I am humbled and awestruck by the precision, grace and beauty of these creatures of God. Nothing else today, nor for some time to come, can compare to this glorious morning and the richness of the Blessing of sharing such wonder with 2 BFs. God is GOOD! And, I am SO thankful to have been a witness to this glorious day.


Uncategorized

Stampin’ Up! Basket of Love

Good Morning Everyone! At the moment it is SNOWING. Again. Snow is better than ice, and some of each is predicted today. Some schools are closed, some are starting late, waiting, I suppose, to see if the weather develops into a ‘closed school’ day.

That said, it is warm and cozy in my craft room and I want to share the wonderful new stamp bundle you can get through Sale-A-Bration, FREE with a qualifying order. Details below. It is called Blossoming Basket and is wonderful!

I chose to use Sweet Sugarplum for my primary color, so that is my card base. Using the same color card stock and the Basket Weave Dynamic Textured Embossing Folder in the bundle. This is a great embossing folder and sure to become a favorite. This was Liquid Glued to the card base.

Using a panel of Succulent Garden Designer Series Paper (retired) to continue the garden-y feel, I stamped the basket from the Blossoming Basket bundle in Basic Gray. I also stamped the same image on Whisper White, then colored them both with the new Stampin’ Blends markers. The colors I used were Light Cherry Cobbler, Light and Dark Calypso Coral, Daffodil Delight, Old Olive and Crumb Cake, and Dark Pink Pirouette. Using the Envelope Punch Board, I rounded the corners of the DSP.

wild wing creations-4

I cut doilies in half and glued them to the back of the art panel to dress it up a bit. I think this also adds to the feminine, garden-y look, and really do like it. The panel was then adhered to the card front with Liquid Glue.

I fussy cut the basket (not the handle) and flowers from the Whisper White and used Stampin’ Dimensionals to adhere it over the image on the DSP. Before sticking it down, I had also stamped the little tag with 3 hearts from the bundle in Basic Gray and colored the hearts in Real Red. I fussy cut this, punched a hole with my 1/8″ hole punch and threaded a piece of Linen Thread through the hole. I stuck this to one of the Stampin’ Dimensionals on the back of the basket before I adhered the whole thing to the DSP.

I really like the blends, and they do blend well, but my coloring skills are NOT great. I am still learning to use them, and have only been partially successful. I think my leaves turned out well, but the flowers….not so much. (Remember, these are HANDMADE cards and, as such, there will be imperfections, at least for me. I am not a machine).

The sentiment is also from the Blossoming Basket bundle and stamped in Basic Gray on Whisper White, then cut with a die from the Lots to Love Framelits. I edged this with my Basic Gray Stampin’ Write marker before adhering it to the art panel with Stampin’ Dimensionals.

wild wing creations-1

The little butterfly is also from the Blossoming Basket bundle (I actually used everything in the bundle except for one sentiment) and was colored with Island Indigo and Pool Party Stampin’ Write Markers. This was also fussy cut and adhered to the sentiment banner with Mini Stampin’ Dimensionals.

On the inside of the card, using liquid glue, I adhered a mat of the Succulent Garden DSP to the card base. The sentiment is stamped in Basic Gray on Whisper White with stamps from the Bird Banter stamp set from the Occasions Catalog. In the center I stamped the Blossoming Basket in Basic Gray and colored it with my Stampin’ Blends.wild wing creations-5

This panel was then Liquid Glued into the card base over the gingham mat.

The envelope flap got another piece of the DSP while little blue butterflies fly about the front. I hope you like this card as much as I do. Card cuts and product list below.

Host code for February: WKARRFPJ

If you would like to order products and don’t have a demonstrator, I would be happy to help you. Just click on the button at right to order or to contact me. Or, leave a comment below.

If you have an order through my blog of at least $50 (before tax and shipping) apply the host code for a free gift from me. For other information about freebies and my Wild Bird Rewards, just click here.

In addtition, Sale-A-Bration is running now until the end of March. This means you can order $50 of products and get a free gift from the Sale-A-Bration catalog. Or you can order $100 and get a bigger gift, or two gifts….you choose.

Card Cuts: Sweet Sugarplum: card base 4-1/4″ x 11″ scored at 5-1/2″, embossed panel 4-1/4″ x 5-1/2″; Whisper White: inside panel 3-3/4″ x 5″, to stamp basket 3-1/2″ x 3-1/2″, sentiment banner 1-1/2″ x 4″, butterfly and tag  1″ x 2″ scrap;  Succulent Garden Designer Series Paper: front panel 3-3/4″ x 5″, inside mat 4″ x 5-1/4″

Blossoming Basket Clear-Mount Bundle

Succulent Garden Designer Series Paper

Succulent Garden Designer Series Paper
[142778]
$11.00
Big Shot

$110.00

Regals Stampin' Write Markers


Uncategorized

Stampin’ Up! Sweet Birthday

Good Saturday to you all! Winter is hanging on, but the snow has almost melted away here in the heartland. I am glad you could join me today as I present a sweet birthday card.

I really like the Cake Soiree stamp set and the coordinating Designer Series Paper and Sweet Cake Framelits. There are a lot of possibilities here. I used to bake and decorate wedding cakes, so this is a MUCH easier way to have cake!

This card is completely done with the above products.

My card base is Whisper White, to which I Liquid Glued a piece of Calypso Coral printed Sweet Soiree DSP. Using one of the Petal Pair Textured Impressions Embossing Folders, I embossed one side of a Whisper White panel to use as a background for my cake.wild wing creations-4
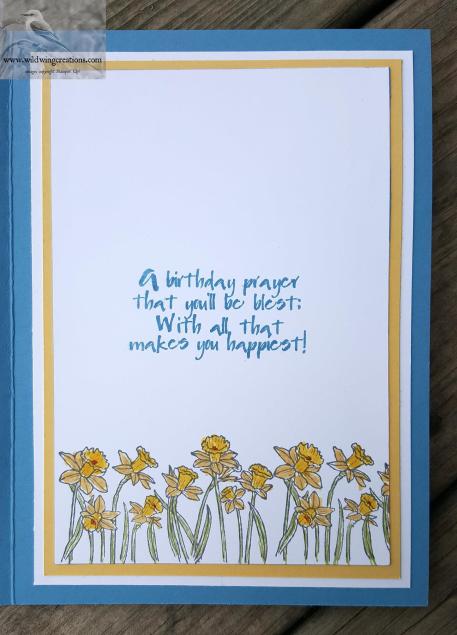
In the upper right corner I stamped the sentiment in Calypso Coral, and adhered this panel to the card front.

I stamped the cake with flowers in Smoky Slate and colored in the flowers and leaves with a combination of Stampin’ Write Markers and Classic Stampin’ Pads with an Aqua painter. The colors I used were Pink Pirouette, Daffodil Delight, Old Olive, Pear Pzazz, Marina Mist and Calypso Coral. After coloring, I used the coordinating die to cut the cake.

The stand is cut from a Silver Foil Sheets scrap. The stand and cake are attached to the card front with Stampin’ Dimensionals and Mini Stampin’ Dimensionals. I decided the cake needed a topper, so I used the ribbon die to cut the ribbon from another scrap of a foiled Calypso Coral in the DSP.

wild wing creations-1

The inside uses the same DSP as the front, with a Whisper White panel for the sentiment. All elements are from the Cake Soiree stamp set. The gift is stamped in Smoky slate and colored the same as the cake on the front. I stamped the sentiment in Calypso Coral.wild wing creations-5

I thought the upper corners looked a little bare, so used the little berry branches to fill in the corners in Smoky Slate. The berries are colored in Marina mist Stampin’ Write Marker. It wasn’t until I started this post that I realized that the string on the gift is only half colored. Perhaps if I hadn’t mentioned it you wouldn’t have noticed! What was I thinking??? Just goes to show that mistakes happen. I can’t fix it as it has already been mailed to the recipient.

For the envelope, the gift is on the front, colored the same as the inside of the card. Another piece of the DSP covers the flap.

I hope you like this card. The Cake Soiree bundle has many elements to give you a lot of potential. And the DSP is really great…one side of each sheet is a foil pattern and the other side is more geometric and no foil.

HOST CODE: WKARRFPJ

Using the host code with an order of $50 or more (before tax and shipping) earns you a free gift from me. There are other rewards available as well. For more information on how to earn Bird Eggs and free stuff, click here.

CARD CUTS: Whisper White: card base 5-1/2″ x 8-1/2″ scored at 4-1/4″, sentiment panel 3-1/4″ x 4-1/2″, cake 2-1/2″ x 3″, inside panel 3-1/2″ x 4-3/4″; Sweet Soiree Designer Series Paper: front mat and inside mat 3-3/4′ x 5″; ribbon on cake 1″ x 1″ scrap

Product List

Uncategorized

Stampin’ Up! You’re Inspiring Birthday

Welcome back to another Inkin’ Krew blog hop! There are some very talented women on this team doing a blog hop featuring Stampin’ Up! products. This month we are all creating projects with a “Birthday” theme. I have created a flowery spring-like  card for our hop. I’m featuring the “You’re Inspiring” stamp set for my project.

inkin-krew-blog-hop-banner2

The only requirement for the hop is birthday, so I was free to choose the style and colors. Since it is for a February birthday, and we are blanketed with snow (and more to come in the next few days), I thought spring sounded good.wild wing creations-4

I began by lightly sponging So Saffron, Pear Pzazz, Pink Pirouette and Marina Mist on a Whisper White panel, then ran it through the Big Shot with the Garden Trellis Textured Impressions Embossing Folder. This I adhered to a mat of So Saffron with Liquid Glue.

Using my Light Daffodil Delight Stampin’ Blend, I colored a length of White Organza Ribbon, wrapped it around the embossed panel and taped it to the back. Stampin’ Dimensionals adhere this panel to the Marina Mist card base.

I stamped the large daffodil image from the You’re Inspiring stamp set Basic Gray on a panel of watercolor paper. I wanted to see how the Stampin’ Blends worked on watercolor paper, hence my choice. Using the Old Olive and Daffodil Delight Blends, I colored in the image. The colors sort of bled out into the paper, so I have not decided whether I like that look.wild wing creations-1

This image was cut with the largest Layering Ovals die. I edged the oval with my So Saffron Stampin’ Write Marker and Liquid Glued it to a panel of So Saffron card stock. Since I had used the largest oval in the die set, I fussy cut a mat for the the oval, using my Paper Snips Scissors.  I then used Stampin’ Dimensionals to adhere it to the card front, over the ribbon.

The sentiment, also from You’re Inspiring, was stamped in Marina Mist on watercolor paper . I cut the flag ends with my Paper Snips and edged it with the So Saffron marker. The left end has a Stampin’ Dimensional while the right end (over the oval) is Liquid Glued to the oval. A perky ‘Stampin’ Blends colored organza ribbon’ bow attached with a Glue Dot finished the front. I thought.

As an afterthought, I decided it needed something something. Pearls? Rhinestones? No. AHA! The Glitter and Clear Epoxy Shapes look like dewdrops on the flowers, so I added a few. One also sits just above the dot on the i in the sentiment. Now it is finished.

For the inside, I stamped an old sentiment that I like in Marina Mist on a panel of Whisper White. Across the bottom marches a row of daffodils from the You’re Inspiring stamp set. These I colored in with my So Saffron, Daffodil Delight, Calypso Coral and Pear Pzazz Stampin’ Write Markers. I edged the panel with my Marina Mist marker and adhered it with Liquid Glue to a So Saffron mat. This was adhered to a panel of Whisper White and into the card base. Card done.wild wing creations-5

The front of the envelope has the large daffodil stamped in Basic Gray and colored with the same markers as used on the inside of the card. The flap is adorned with a row of Basic Gray stamped daffodils, left uncolored.

Now, please hop on to see what Mary has created for you today. Or, if you prefer, go in reverse and see Sue’s project. Enjoy the hop!


inkin-krew-blog-hop-previous2

inkin-krew-blog-hop-next2

  1. Linda Richenberg
  2. Karen Finkle
  3. Mary Deatherage
  4. Sue Prather
  5. Julie Johnston
  6. Amy Koenders

If you need a demonstrator, I would be happy to help you. Please contact me, or just click on the Shop Online button at right and place your order. If you care to comment, that is always appreciated

Product List

Uncategorized

Stampin’ UP! Lots to Love Cube Box

Good morning Everyone! I am supposed to go to a meeting, but waiting to see if the roads are good enough for me to venture out. We had between 5-6″ of snow yesterday. Lots of accidents. Since we haven’t had a lot of snow thus far this year, I think people forgot how to drive in it.  Last I heard was that there were 6 highway fatalities and several people left critically injured. Me? I stay home when it is bad. Not worth my life or someone else’s just to go somewhere, even to work.

I saw this Jan B video on You Tube a couple days ago and just had to try making these adorable boxes. Jan is a Stampin’ Up demonstrator from the UK. The boxes are a smidge over 3″ with a heart shaped acrylic window. I plan to make 14 of these and fill them with homemade cookies and maybe some valentine candy for the little people in my life. So far, I have 5 done. Well, not TOTALLY done. I still have to punch the hole in the lid and run the ribbon or whatever in some of them, so I am only showing my first attempt today, and pieces of a second one. Perhaps I will show the rest in a later blog post.wild wing creations-3

Here is the link to Jan B’s video. Jan B  She explains everything very well, so I will not attempt to do more than give you the basics. However, the video is about 50 minutes long, so just FYI! That said, if a picture is worth a thousand words, I am not sure how many words it would take to describe the video! Hence, the link and my rather brief description.

You will need the Lots to Love Box Framelits that is bundled with the Sure Do Love You stamp set in the Occasions Catalog. Also some card stock, Designer Series Paper, Clear Acrylic Sheets, a Big Shot and a hole punch. I also used my Simply Scored Scoring Tool and Bone folder. Oh, yes, and some twine or ribbon.wild wing creations-2

card stock-Cut 4 pieces at 4-1/2″ x 6-3/4″ from which you will cut 4 box pieces. You can get 2 pieces from one sheet of card stock and some scraps. Use the scraps to cut 2  large hearts from the Lots to Love Box Framelits.

card stock-cut 1 piece 2-7/8″ x 2-7/8″ for the base and a piece of DSP 2-3/4″ x 2-3/4″  and adhere these together. Set aside.

Cut a DSP 12″ strip 1-3/4″ wide, or 2-6″ strips that wide. This is for the decorating the lid flaps.

From your chosen DSP cut 4 squares at 2-7/8″ x 2-7/8″

Place the cut out box pieces horizontally, with the squared end at the left, on the Simply  Scored tool and score at 1-7/8″.

On 2 pieces trim off the little tabs. Also, trim off the scored sides below the 1-7/8″ score line. Angle trim the edges below the 1-7/8″ score line.wild wing creations-3

It will look like this:wild wing creations-4

On the other 2 pieces trim off both long edges along the score line. Angle cut the sides below the 1-7/8″ score line. It will look like this:wild wing creations-1

NOW! Deep breath. Jan did these separately, but it worked better for me to cut both at the same time. Your choice. Center a 2-7/8″ DSP square on the square part of one of the narrow card stock box pieces as shown above. I did not do the best job of centering this piece in the example above. Center the large heart die on this and die cut. Either use temporary tape to hold things in place or use a magnetic platform. Save these hearts. You will use the card stock one on the box.

Carefully fold on all the score lines on all the box pieces EXCEPT the top one that forms the lid. (There are 2 score lines at the top, only fold the bottom one, the one that makes the square below) Use bone folder to crease.

On the back side of the DSP apply Liquid Glue around the heart and around the edges of the square. Stay at least 1/8″ away from the heart opening so it won’t squish onto the acrylic. After placing the acrylic on the cutout DSP, apply glue to the acrylic in the same manner and adhere to the card stock cut out, lining up the hearts perfectly.

On the other three box pieces, liquid glue the other 3 2-7/8″ squares. To these adhere a card stock large heart centered with a small heart cut from DSP.

Lay out the pieces as pictured. Starting with the piece at left, apply liquid glue to the right side tab and adhere the window piece to this. Proceed left to right in the same manner.

wild wing creations-2

Turn the flat box over and fold in the right hand piece as one panel, fold the left piece over and glue these together. Your box is starting to look like a box.

On the bottom, fold in two opposing sides, then the other two sides. Liquid glue in place. Press together from the inside to assure a good bond. Now, liquid glue the set aside base piece to the bottom. You now have a box with 4 curved tabs on top.

Jan’s video explains about making a template, but you will need to cut another box shape from something you probably won’t use for a project and keep it for the next box project. This will become the template for where to punch the hole for the ribbon. You will also trace around this to make another template from which you will cut your 1-3/4″ DSP strip(s) into 4 curved tabs. These will finish decorating the lid flaps.wild wing creations-1

Punch the holes, thread the ribbon and Woo-Hoo, you have a lovely box! I think these are too cute for words. Enjoy!

If you do not have a demonstrator, you may order from me by clicking on the Order online picture of a Scissor-tailed Flycatcher at right.

The DSP I used is from the 6″ paper pack of last year’s valentine paper, now retired. If you use a directional paper, just be careful to have all pieces running the correct way. I did not do this on my first box, the one pictured above. It is MUCH easier to use an all-over pattern as shown in the construction photos.

You do not have to cut the window, nor do you need to add the hearts to the sides. Use your own creativity to make these boxes the way YOU want to make them. I plan to change them up in the future.

Product List

Uncategorized

Stampin’ Up! Country Livin’ for a man

Good Friday morning to you all out there in Cyber land. It is cold again in the heartland, but I think this card is cozy for a man with a February birthday. And, it’s red, so if you just change the sentiment it could be a Valentine card. Add an enameled heart shape and there you go!

I began this card with a Real Red card base. Next, I Liquid Glued a panel of the red and black plaid that I had on hand in my scraps from a previous project to a Basic Black mat.

The red and black plaid just said ‘country’ to me, so I followed that theme and stamped the boots from Country Livin’ in Memento Tuxedo Black on a piece of light colored Wood Textures DSP. These were colored in with my Light and Dark Crumb Cake Stampin’ Blends Markers. The sentiment, from Happy Birthday Gorgeous, was also stamped in Tuxedo Black. Somehow that just didn’t look right, and since I had used my Stamp-A-Ma-Jig to place it in the correct spot, I simply cleaned my stamp, re-inked it in Real Red and stamped over the black. The Stamp-A-Ma-Jig allowed me to get a perfect placement over the black.

wild wing creations-3

This was adhered with Liquid Glue to a die-cut black mat. These rectangular dies are from Scrapbooking Made Simple, and I thought made the perfect mat for the sentiment panel. This panel was then attached, off center, to the matted card front panel with Stampin’ Dimensionals.

Using some Linen Thread I wrapped it around the card front three times and taped it on the back. A loopy bow is tied on to the three strands and the completed front is adhered to the card base with Stampin’ Dimensionals.

For the inside, I die-cut another black mat and Liquid Glued a smaller piece of the plaid to it. To this I adhered the sentiment panel, again with Liquid Glue. The sentiment is stamped in Real Red, again on a panel of Wood Textures DSP, and is from an old set that I don’t even remember what it is. There are several sentiments in the set though.

wild wing creations-4

This completes the card. The Whisper White Medium Envelope was finished with another pair of boots, stamped the same as the front of the card, and the flap received another piece of the red and black plaid.

I enjoyed making this card and was pleased with the outcome. I hope you enjoy it as well.

HOST CODE: ZERXEPFW   This code will be good for the month of February.

What is the HOST CODE, you ask? Use it when you place a $50 order through me and you get a free gift valued up to $10. Click HERE for all the details on my customer rewards. It will be worth your while.

AND…with a $50 order you will also get my free tutorials for the Hold on to Hope Bundle, which includes 6 lovely projects.

Hold on to Hope Collage

Card Cuts for today: Real Red: card base 5-1/2″ x 8-1/2″; Basic Black: front base mat 4-1/8″ x 5-3/8″, front sentiment mat 2-7/8″ x 4-3/8″, inside mat 4″ x 5-1/4″; Plaid paper: front 4″ x 5-1/4″, inside 3-1/4″ x 4-1/2″; Wood Textures DSP: front 2-1/2″ x 4″, inside 2-3/4″ x 4″

NON-Stampin’ Up! products used for this card: dies from Scrapbooking Made Simple,  red plaid paper from my stash, and inside sentiment (unknown)

Product List