autumn, Uncategorized

Stampin’ Up! Gathered Leaves and Gratitude

Good Saturday morning, Folks! I hope your weekend is off to a good start. So much to do, so little time! And, it seems to move more quickly with each passing day. Make the most of YOUR time!

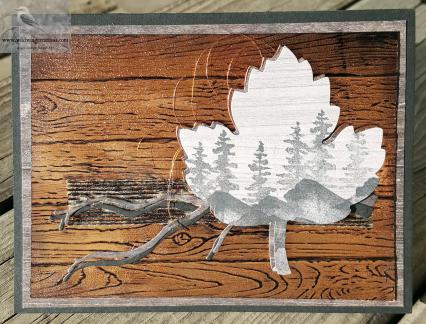
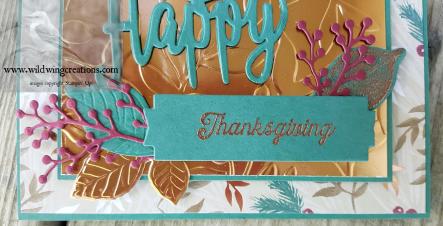
Today’s card uses several stamp sets to accomplish a different autumn look. My card base is Cajun Craze, which has to be my go-to color for fall. To this I adhered a Grapefruit Grove mat with a panel of Come to Gather Designer Series Paper.

4

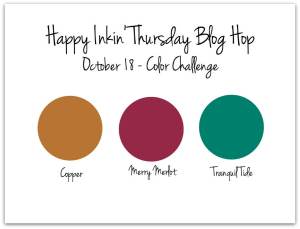
I knew I wanted to use copper on this card, so proceeded to stamp the small leaves from To Every Season  in Versamark ink, after rubbing my Embossing Buddy over the whole panel. I do this so there won’t be little bits of copper where I don’t want them. I then added the Copper Stampin’ Emboss Powder and set it with my heat gun.

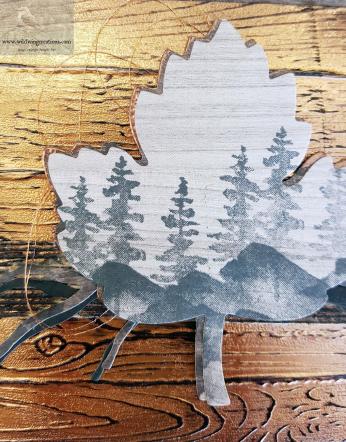
Next, I stamped the large leaf from Gather Together in Cajun Craze, and cut it out using the matching die from Gathered Leaves. I also cut one from a Post-It note to use as a mask, anticipating that I might need a mask.

I thought the wheat from Gather Together would be a nice autumn touch, so I stamped it in Soft Suede ink on Soft Suede card stock. I am not sure this was the best choice, but I didn’t make that decision until I had already glued it onto my card front, so there the wheat stays. By the way, these were fussy cut.

1

I inked one of the cut-and-emboss dies from Gathered Leaves in Versamark ink, then cut and embossed it on a scrap of Cajun Craze. I then heat embossed it for a different look. I also cut two leaves using the cut-and-emboss dies from Gathered Leaves from Copper foil.

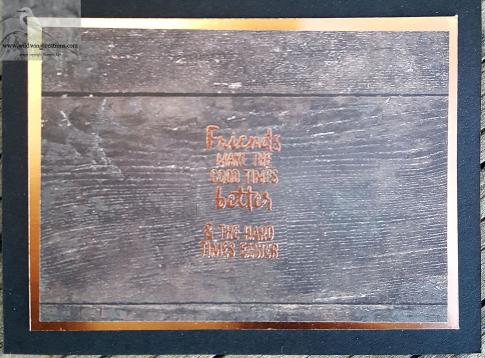
The sentiment, from Day of Thanks is stamped in Cajun Craze on Grapefruit Grove, then die cut using one of the Stitched Nested Labels dies. This was adhered to my card front with Liquid Glue.

Next up is the dry arrangement of the wheat and leaves. The large leaf and wheat are fixed on the card front with Liquid Glue. Stampin’ Dimensionals were used to adhere the coppery leaves. A final touch was the Linen Thread bow, which is attached with a Glue Dot.

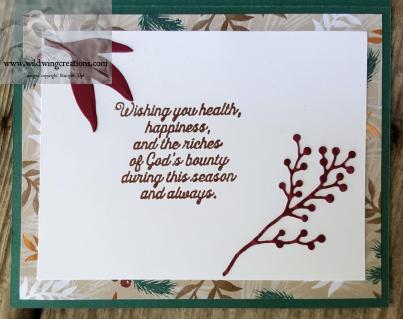
On the inside, I simply stamped more of the small leaves from To Every Season, and heat embossed them in Copper Stampin’ Emboss Powder. I left the rest blank so I could write a personal note.

5

The envelope got a strip of the Come To Gather Designer Series Paper on the flap and more of the leaves stamped on the front.

3

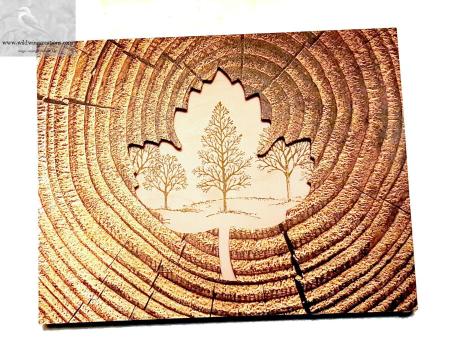
I started the front design by stamping the large leaf in Cajun Craze, letting it run off the edges. Here is where my fore-thought in making a mask came in handy. I used it to cover my stamped image, then stamped the wheat and some of those small leaves. The Wheat was stamped in Soft Suede and the little leaves in Versamark. They were then also heat embossed in Copper.

2

I hope you enjoy my card. The Grapefruit Grove is a departure from my usual autumn color scheme, but I think it is good.

Please leave comments below.

Back by popular demand: Designer Series Paper sale. BUT YOU NEED TO HURRY as this sale ends Monday. To order, just click on the bird image that says ‘Shop with me’.

buy 3 get 1 DSP

Here are the details:

  • All order types qualify for this promotion.
  • Only Designer Series Papers listed in the table below qualify for this promotion. You may mix and match papers from any of the listed papers.
  • There is no limit to how many times participants can buy three packages of Designer Series Paper, and get one free during this sale.
  • As you order online, when three qualifying Designer Series Paper packs are entered, a prompt to add a free Designer Series Paper will appear.
  • In the online store, if you order four packages of the same qualifying Designer Series Paper, you’ll need to enter three together and then order the fourth free item separately.
  • Designer Series Paper ordered as part of a Starter Kit does not qualify for this sale.
  • Designer Series Paper ordered with Stampin’ Rewards does not qualify for this sale.

Buy-3-Get-1-DSP-Chart

Product List

Uncategorized

Stampin’ Up! Thank You for Happy Inkin’ Thursday Blog Hop

Happy New Year to all of you who follow this blog!! For some of us, we look forward to a better 2019. For others, 2018 was a good year and the hope is for an equally good, or better, 2019.
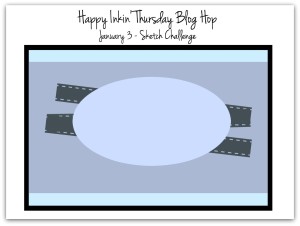
I don’t make resolutions, but I do hope to do a better job of making and sending more cards, because I think it is VERY appreciated by the recipients. We have become so commercialized and accumulating of STUFF, that we tend to forget the simple pleasures of making and giving of ourselves. That said, ON WITH THE HOP!

Today we have a sketch challenge, and I, having many thank you cards to send, chose to use that design for special thanks.

I haven’t done an outside challenge for awhile, but my card fits the Sunday Stamps Challenge this week, so I have entered this challenge also.sunday stamps 195

On with the HOP! Here is my card using the above challenges.

4

My card base is Early Espresso. To that I have added a mat of Calypso Coral, which I textured with the Subtle Dynamic Textured Impressions Folder. Over this is a panel of Crumb Cake, which is stamped with the new Crackle Paint background stamp (found on page 44 of the Occasions catalog) in Crumb Cake. I like this look!

My sentiment is from All things Thanks and is stamped in Early Espresso on So Saffron. There are more words to this sentiment, but I blocked them off with a piece of tape, inked the part I wanted, removed the tape and stamped. This was cut using the largest oval from the Stitched Shapes Framelits.

1

The leaf is from Falling for Leaves (which retired yesterday from the Holiday catalog) and was stamped in Early Espresso on Very Vanilla card stock, then colored with my Stampin’ Blends in Dark Calypso Coral, Dark Crumb Cake and Light Daffodil Delight. I fussy cut this with my Paper Snips Scissors. Liquid Glue adhered this to the sentiment oval.

A length of Burlap Ribbon was adhered with strips of Tear & Tape. Stampin’ Dimensionals adhere the sentiment over the ribbon. Card front done.

Inside the card I layered Crumb Cake, Calypso Coral and So Saffron using Liquid Glue. Early Espresso ink was used to stamp the sentiment from Falling for Leaves. The little flower stems, or are they leaves?, are stamped also in Early Espresso and come from Falling for Leaves as well. 5

My sister gave me an extra special gift for Christmas (which will be the subject of a future blog) and this card is for her. I am so grateful for my family.

The Very Vanilla medium envelope flap got the Crackle Paint treatment in Early Espresso. A couple of the same flowers as on the inside decorate the front.

Now, on with the hop. Just click the ‘next’ button to go to the very talented Amy’s blog, or click on any name to go directly to that blog.

Amy Koenders

Shelagh Freemantle

Mary Deatherage

Kristi Gray

Jaimie Babarczy

Sue Prather

Karen Finkle

Julie Johnston -You are here

Host code for January: XMW3QDQ6 

To learn more about my customer loyalty program just click here. You will see that you can earn free stuff, and who doesn’t like free stuff??

Ordering from the new Occasions catalog and the ability to earn even more freebies from the Sale a bration catalog begins today. If you don’t have these catalogs and don’t have a demonstrator, please contact me and I will send them to you. There are many wonderful products in these, and I am sure you will want to get some of those products.

Product List

Uncategorized

Stampin’ Up! Thanksgiving for Happy Inkin’ Krew Blog Hop

Blog hop headerHappy Thanksgiving, Everyone!! I hope this day you can find many things for which to be thankful. Among the many blessings I have, are the friends with whom I do this hop each Thursday. We have a good time and love to share our creativity with all of you!

Today we have a sketch for inspiration.

And here is my take on the sketch. I wanted to do another Thanksgiving card, as I love the fall colors and leaves. Also, Thanksgiving is only second to Christmas for favorite holidays, mainly because it is a day to be thankful and, so far, isn’t too commercialized. Also, it is the only time during the holiday season that I am able to be together with my siblings and their families, as well as my own.

4

The first thing I did after cutting my Pumpkin Pie card base was to use the Pinewood Planks Dynamic Textured Embossing Folder to dry emboss the front of the card base. The second task was to dry emboss a Copper Foil Sheets panel with the Layered Leaves DTIEF. This was adhered to an Early Espresso mat, which was then adhered to the card base. Instead of a ribbon, I used some leaves cut from Pumpkin Pie and Mossy Meadow, using dies from the Foliage Frame Framelits.

I also deviated from the rectangle behind the sentiment panel, as shown in the sketch, by cutting two maple leaf shapes from Cajun Craze using the thinlits from Seasonal Layers. The detailed leaf stamp from the coordinating Colorful Seasons stamp set was used to stamp the leaves with Versamark and heat emboss with copper.  Before applying the stamp to the card stock, I rubbed the leaves with the Embossing Buddy to remove any static that might make the embossing powder cling where I didn’t want it.

1

These leaves were then placed behind the sentiment, in place of the rectangle in the sketch, and the small leaves dry arranged behind them. When I was satisfied with the arrangement, I used Liquid Glue to attach them to the embossed copper panel.

The Sentiment is from Pleasant Pheasants, stamped with Versamark and embossed with Copper. The small leaf stamp is from the Feathers and Frost set, also copper embossed. To set the sentiment panel off, I dipped the edges into the Versamark pad and copper embossed the edges as well. This was then Liquid Glued to an Early Espresso mat. Three enamel shapes finish the sentiment panel, which I then adhered to the card front with Stampin’ Dimensionals.

The inside sentiment and leaf design are all from the Pleasant Pheasants stamp set,  stamped with Versamark and heat embossed with Copper Stampin’ Emboss Powder, again using the Embossing Buddy before stamping. I really like this sentiment, and the leaves carry the leafy theme to the inside of the card. This liner is Pumpkin Pie and is adhered to an Early Espresso mat with Liquid Glue.

5

For the envelope, (can you believe it?) MORE copper! A row of the same leaves as on the inside are on the front, and just one imprint on the flap. In case you hadn’t noticed, I LOVE the look of copper!

I hope you like my card, but if you don’t, that’s OK. I do, and I think the recipient will, too. Please leave comments below. Now, please click on the ‘next’ image to move on and see what the super creative Amy has for you. Unless, of course, you prefer to just ‘hop’ around by clicking on an individual name. Don’t get lost! Card cuts and product information below the names.

Amy Koenders

Shelagh Freemantle

Mary Deatherage

Kristi Gray

Jaimie Babarczy

Sue Prather

Julie Johnston – You are here

CARD CUTS: Pumpkin Pie: card base 5-1/2″ x 8-1/2″ scored at 4-1/4″, front sentiment 2″ x 2-1/2″, leaves 1-1/2″ x 2″, inside liner 3-3/4″ x 5″; Early Espresso: mat for copper 3-3/4″ x 4-1/4″, sentiment mat 2-1/8″ x 2-5/8″, inside mat 4″ x 5-1/4″; Copper Foil Sheets: 3-1/2″ x 4″; Mossy Meadow: leaves 2″ x 2″, Cajun Craze: leaves 2″ x 4″

The Host Code for November is WV7QS9PE.

Please click here for details on when to use the host code. Or, if you have questions, don’t hesitate to contact me. If you do not have a demonstrator, and would like to purchase the products used for this card, please just click on the ‘shop online’ button at right on this page. It is near the top of the page. This will take you directly to my online shop.


online xtravaganza

Beginning tomorrow, November 23, through November 28, Stampin’ Up! is having a SALE! This amounts to just about everything in the annual catalog being 10% off, with different items offered over the sale period.

DETAILS:

Online Extravaganza will run for six days. During this time, we’ll be throwing three, 48-hour sales featuring a selection of products from the 2018–2019 annual catalog—all at 10% off! Each 48-hour sale will feature two product categories (e.g., paper, stamps, ink, etc.). When one sale ends, the next sale begins; this cycle will continue until Online Extravaganza is over. By the end, nearly every item from the annual catalog will have been on sale!

November 23–24

PAPER & EMBELLISHMENTS

  • Bags
  • Brads and Buttons
  • Cards and Envelopes
  • Cardstock
  • Designer Series Paper
  • Embossing material
  • Glitter
  • Ribbons
  • Twine
  • Specialty Paper
  • Tags
  • Washi Tape

November 25–26

STAMPS & KITS

  • Stamp sets (clear-mount, wood-mount, and photopolymer)
  • Project kits
  • Card kits
  • Kit refills
  • Memories & More
  • Punch box kits

November 27–28

TOOLS & INK

  • Adhesives
  • Applicators
  • Cleaners
  • Cutting tools
  • Embossing folders
  • Framelits and thinlits
  • Ink Pads
  • Ink refills
  • Markers
  • Punches
  • Scoring Tools
  • Stamp blocks and cases

Ordering Deadlines: 11:50 P.M. at the end of each 2 day period, November 24, 26 and 28

If you  would like to see the full selection of discounted items during each 48-hour sale, please visit my online store. Each sale will be given its own category, which will contain all available discounted items for that particular 48-hour sale. After that, the only thing left to do is shop! Woo-Hoo! We all love a sale. So get your wish lists ready.


snowflake showcase

The Snowflake Showcase will only be around for another week, so if you want any of the products in this suite, add them to your Extravaganza order.The Velvet Paper is sold out.


Product List

Uncategorized

Now it’s November!

Good morning Everyone! It is a beautiful day here in Iowa, but we could use a little rain to settle the dust. And though it is already November, today I am sharing some images from October in Utah. Here at home, most of the trees have lost their leaves.

2

This scene was fairly common from the side of Burr Trail.

I have been traveling, in fact, just arrived home yesterday from a trip to beautiful Utah. I took the Amtrak train to Salt Lake City, met a photographer friend there and we rented a car to drive 4-1/2 hours to Boulder, which is in the Escalante Staircase/Dixie National Forest area. The scenery is wonderful. We also went to Bryce Canyon. None of my Bryce Canyon images are downloaded, so you won’t see those today.

The yellow of the cottonwoods (most of the Aspens had already lost their leaves) really stands out against the red canyon walls.

1

Did you know there are 5 National Parks in Utah? Arches, Bryce Canyon, Canyonlands, Capital Reef, and Zion are the 5. But wait! There is more. Bears Ears, Cedar Breaks, Dinosaur, Grand Staircase-Escalante, Hovenweep, Natural Bridges, Rainbow Bridge, and Timpanogos Cave are all National Monuments. In addition to that, there are 2 National Recreation Areas-Glen Canyon and Flaming Gorge. These are all federal lands and well worth seeing. In 6 days time I did not have time to see many of these, so a trip back to Utah is on my ‘to do’ list.

That’s not all! There are 6 National Forests, 31 National Wilderness Areas, 583 miles of National Historic Trails, 1 National Historic Site, 2 National Conservation Areas, 3 National Wildlife Refuges, 18 National Recreation Trails, and 8 National Scenic Byways.

By contrast, Iowa has 1 National Monument, 1 National Historic Site and 2 National Historic Trails. While Iowa is beautiful any time of year, it is a totally different kind of beauty.

I would say Utah is a dry climate, but where there are rivers or streams that are not dried up, you will find trees, birds and gorgeous reflections on the water’s surface.

4

Of course, as a photographer, I will go at specific times of the year to try for the best images. The ones on this post are all from the same day, though at different times of the day. I haven’t had time to download the rest of my images. I even got a few bird shots in, though none are especially good. Here is one of a White-crowned Sparrow. I did add 3 species to my life list.

1


The rocks are not all red, but it is the predominate color. We found a slot canyon that was simply beautiful, no less so because it was easy to get to. Some slot canyons have to be accessed by a series of ladders, which I can’t/won’t negotiate. The entrance to this canyon is not readily noticeable.

5

I would suggest that if you are looking for a lovely place to visit, a place where you can see a variety of landscapes, you might want to consider Utah. Prior to this visit I had only been to Salt Lake City and the 4 corners area, but no place in between. I still haven’t been to the Great Salt Lake, nor any of the National Wildlife Refuges. Those are on the agenda for my next visit.

Of course, in October the cottonwoods are a spectacular golden color, no matter the angle from which you view them.

3

1

That is enough to dazzle you for one day, and if, by chance, you are trying to decide where to go on your next vacation, you might want to consider Utah.

Please leave any comments below. Thanks for stopping by.


Uncategorized

Stampin’ Up! Leaves and Plaid Thank You

Are you surprised it is Friday again? Seems like the weeks just spin by, or am I just getting old and it is just my perception? Anyway, time marches on and I have to try to keep up.

Here is my card for today, which is playing along with the Words 2 Craft By Challenge.

4

W2CB #58: Now for October Eves

For this challenge, the words come from Humbert Wolfe.
Listen!
The wind is rising, and the air is wild with leaves,
We have had our summer evenings,
now for October eves.

I like that quote. Fall, or Autumn if you prefer, is my favorite season. I love the cooler temperatures, the colors as the trees change from their summer dress to their party frocks. There are many more reasons for this to be my favorite season, but I won’t go into all of them. ON WITH THE CARD!

My order with the new Snowflake Showcase items came the other day, so I thought I would check out the lovely VELVET paper. It feels SO nice, soft and velvety. I wondered if it would work to make a ‘flannel’ shirt plaid and thought I should try it. It is only paper, right?

The Buffalo Check stamp is large, so I stamped a panel of the Velvet Paper that was as large as the stamp, mainly so I would have room to manipulate it if necessary. I used the Stamparatus, stamping it three times with Crushed Curry. I was extremely careful to have everything straight and still managed to stamped crookedly! Unbelievable. Well, at least I had room to trim it so it was straight.

1

Stamps ‘n’ Lingers has a great video on making plaid, so I won’t re-invent the wheel here. Just click on the link above to go to her video. Suffice it to say that I used my Mossy Meadow, Soft Suede, Pumpkin Pie and Cajun Craze Stampin’ Write Markers for the plaid lines. I used the brush end of the Soft Suede and Cajun Craze for the ‘fat’ lines, and the bullet end of Pumpkin Pie and Mossy Meadow for the fine lines. I do think it looks like flannel, and it certainly feels like it.

This panel was adhered with Tear & Tape to a Mossy Meadow mat, and onto the Cajun Craze card base.

I stamped a few leaves with the Colorful Seasons stamp set with Cajun Craze on Cajun Craze, Mossy Meadow and Mango Melody card stocks. These were die cut with the thinlits from the Seasonal Layers. The large detailed leaf is Mango Melody. All the leaves were sponged lightly with Cajun Craze and Mossy Meadow to give them a ‘changing color’ look, which fits in with October leaves.

4

These were attached to the plaid with Glue Dots, after arranging them so that they mimicked “the air is wild with leaves” portion of the quote.

The sentiment, from Love What You Do, was stamped in Mossy Meadow on Crushed Curry, then punched out with the Tailored Tag punch. I used my Mossy Meadow Stampin’ Write Marker to go around the edge before adhering it to the card front with Stampin’ Dimensionals. Card front-done! I like it.

For the inside, I inked the sentiment stamp from All Things Thanks with Mossy Meadow, Cajun Craze and Crushed Curry Stampin’ Write Markers. To do this, simply apply the markers directly to the stamp. I wasn’t too careful how I did it, just made sure to cover all of the stamp. I then huffed on it to re-moisten and stamped it on a panel of Whisper White card stock.5

Remember I had to trim the plaid to straighten it? I decided to not waste those pieces, so used Liquid Glue to adhere them above and below the sentiment. Yes, they are stamped crookedly, but, so what? I think with the cut angles it looks fine. Tell me what you think.

The envelope flap was stamped directly. To do this I inserted a scrap of copy paper under the envelope on my Stamparatus and another under the flap. This ensured that the stamping only went where I wanted it to be. The Buffalo Check is stamped in Crushed Curry and I did the same with markers as for the front piece.

The front simply has a stamped-off-once Cajun Craze leaf, then the detail is stamped in full strength Cajun Craze.

I hope you will try making plaid, and enjoy it as much as I enjoy it.

The Host Code for the remainder of October: EV7ETS99

Go here to learn the details on using the host code and my customer loyalty rewards program. You can earn bird eggs toward free stuff, and more! Check it out.

You will be able to purchase the Velvet Paper November 1 when the Snowflake Showcase becomes available to everyone. Remember though, this is only good while supplies last, so get yours early!

CARD CUTS: Cajun Craze: card base 5-1/2″ x 8-1/2″ scored at 4-1/4″, leaves 2-1/2″ x 3″; Mossy Meadow: front mat 3-1/2″ x 4-3/4″, inside mat 4″ x 5-1/4″, leaves 2-1/2″ x 3″; Velvet Paper: for plaid finished at 3-1/4″ x 4-1/2″; Whisper White: inside liner 3-3/4″ x 5″; Crushed Curry: sentiment tag 3″ x 4″; Mango Melody: leaves 2-1/2″ x 3″

Product List

Uncategorized

Stampin’ Up! Happy Thanksgiving

Good Thursday morning Everyone! It is time once again for our monthly Blog Hop with our friends in Canada. We have a color challenge and a sketch challenge. It is up to the individual whether to use one or both challenges. I am using both. Our Colors for this hop are:

And here is the sketch:

With these in mind, I opted to make a Thanksgiving card. Here goes! I hope you enjoy this hop as we have several very creative women participating today.

My card base is Tranquil Tide with a mat on the front of the Joyous Noel Specialty Designer Series Paper. This paper has the 3 required colors.

4

I love the Copper Foil Sheets embossed, whether dry embossed or heat embossed. For today I dry embossed it with the Layered Leaves 3-D Dynamic Textured Embossing Folder, and mounted it on a mat of Tranquil Tide with Liquid Glue.

For the sentiment, I cut the word Happy with the Happy Birthday Thinlit from Tranquil Tide three times and stacked them. I used Liquid Glue to adhere this to the copper. I stamped the Thanksgiving portion of the sentiment from Pleasant Pheasants in Versamark ink and heat embossed it in Copper. This was cut with a Lakeside Framelit and adhered to the copper with Stampin’ Dimensionals.

After it was adhered, I wished I had edged the die-cut with Versamark and dipped it in the Copper Emboss Powder. Hindsight, you know. I might remove it and do that, but time doesn’t allow it right now. I do think it will improve the card.

1

The small leaves are Tranquil Tide, embossed and cut with the dies from Nature’s Roots. One is also stamped and heat embossed with Copper Emboss Powder. The copper leaves are also from Nature’s Roots, dry embossed and cut. The berry branches are cut from Merry Merlot. The dies for these are from the First Frost Bundle

I dry fit everything then Liquid Glued them in place. This finishes the front.

On the inside a mat of the same Joyous Noel DSP as on the front frames a Whisper White sentiment panel. I flipped the mat over and die cut a berry branch (First Frost Bundle) from the center of it. This was attached to the sentiment panel with Liquid Glue. A leafy branch was cut from Merry Merlot card stock with another die from the First Frost Bundle, trimmed and adhered with Liquid Glue.

5

The sentiment is from Pleasant Pheasants and is stamped in Merry Merlot. This sentiment panel is adhered to the mat with Liquid Glue.

The envelope has the trio of leaves on the front embossed with Copper Emboss Powder and more of the Joyous Noel DSP on the flap .

Now, to move on through the hop, just click on the ‘next’ button, or on any of the names to skip around.

Don’t forget to leave a comment, as I do appreciate that. Thanks for hopping with us!

Amy Koenders

Shelagh Freemantle

Mary Deatherage

Kristi Gray

Jaimie Babarczy

Karen Finkle

Julie Johnston-you are here

Sandi MacIver

Eva Dobilas

Host Code: EV7ETS99 good through the end of October.

Go here to learn the details on using the host code and my customer loyalty rewards program.

If you don’t have a demonstrator and need products or have questions, please contact me. Or if you would like a catalog, let me know.

clearance rack

Check out the Clearance Rack. There just might be something there youhave been needing, like Fast Fuse refills? When they are gone, they will be gone for good.

Fingers crossed that my order with the Snowflake Showcase arrives tomorrow. You will be able to order on November 1. These products will be available through November 30 or as long as supplies last.

CARD CUTS: Tranquil Tide: card base 5-1/2″ x 8-1/2″ scored at 4-1/4, mat for copper 3-1/8″ x 4-3/8″, Happy (cut 3) sentiment 3″ x 6″, leaves and sentiment banner 1-1/2″ x 3-1/2″; Joyous Noel Specialty Designer Series Paper: front mat 4-1/8″ x 5-3/8″, inside mat 4″ x 5-1/4″; Copper Foil Sheets: embossed panel 3″ x 4-1/4″, triple leaf, 2-1/2″ x 3″; Merry Merlot: berry branches and inside leaf 3″ x 4″

Product List

Uncategorized

Natural Dyes Workshop card.

I was privileged to spend a weekend recently with about 15 other women at a workshop on Dyeing with the plants that are all around us. I have been interested in dyeing for years, and have done a little yarn dyeing with Procion Dyes. When I found out about this workshop there was only one spot left. I guess it was meant to be mine, so I took it.

There is a story behind the way I discovered this workshop, which I will not go into here. Let’s just simply call it a “God Thing.” Sometimes you just have to be alert to what He is saying, and be obedient.

What fun! And what an interesting time it was. I learned the process of using plant products as dyes (other than onion skins and black walnuts, both of which I had tried) and what mordants to use to achieve certain colors.

We also learned leaf printing, which was FANTASTIC! The card I made for today uses a piece of the watercolor paper that I leaf printed in a Sumac dye bath, with iron as a mordant.

I liked the colors it made, a sort of very pale yellow with dark edges, which I interpreted as Early Espresso. There were gray undertones, which I decided were Gray Granite. The pale yellow became So Saffron, so those are the colors of my card.

wild wing creations-4

The watercolor paper was layered with leaves. I used different ones, Birch, Oak, Maple, Ninebark and Wisteria, as well as a weed that had an interesting leaf and some ferns. These multiple layers were tied together and dropped into the dye bath.

Today’s card features a Birch branch with several leaves.

I began with an Early Espresso card base and matted a panel of So Saffron on that. I then trimmed the dyed watercolor paper to fit with the teeniest of margins. All of the layers are adhered with Liquid Glue, except for the front sentiment piece, which is attached with Stampin’ Dimensionals.

wild wing creations-1

The sentiment is Early Espresso stamped on Gray Granite and cut with the framelits from the Blended Seasons Bundle. The sentiment is from Rooted in Nature. One of the leaf stamps in Rooted in Nature mimics the Birch leaves, so I stamped it in Gray Granite on So Saffron and cut it out with the coordinating framelit in the bundle.

On the inside I stamped the same leaf in Gray Granite ink on Gray Granite card stock. This became my mat for the sentiment panel, which is So Saffron. The leaves in the corners are stamped in Gray Granite and the sentiment is Early Espresso. This sentiment is from Healing Hugs.

wild wing creations-5

To sort of give the inside the same organic sense of nature, I sponged around the edges of the So Saffron panel with a sponge Dauber and a bit of Early Espresso.

I really like the way this card turned out, and am excited to make more cards with some of the other leaf prints I did.

The Very Vanilla envelope simply has the same leaf pattern stamped in Gray Granite on both the front and the flap.

I hope you enjoy this card as much as I enjoyed making it. Even more did I enjoy the dyeing process. I just have to accumulate more big pots in which to do my dyeing, so I can fit in larger pieces.

In all, we did 10 or 11 dye baths using Oak, Hickory, red cabbage, Barberry, sumac, Red Maple, Lemongrass, goldenrod, poke berry and Marigold. We used different parts of the various plants, seeds, berries, leaves, bark, husks, etc, and different mordants produced different colors.

For example, my partner and I gathered Goldenrod flowers and leaves and put them in the pot with water. When the water boiled and turned color, we dipped out 3 samples to try with different mordants. The prettiest yellow resulted from the one with Alum as a mordant. The Copper lent a green color and the Iron made a dark greenish gray. All were lovely colors, but we decided to use the Alum for a lovely yellow.

I came home with not only my paper pieces, but several lengths of dyed and printed silk as well. And samples from each of the dye baths and the different mordants. This could easily become my new passion, but at the moment I have too many irons in the fire to spend any time doing it. There is always next year, and I will take the lessons learned in this process to another level, as well as doing some research and accumulating the necessary equipment.

There is a whole host of plants, or plant parts, that can be used for dyeing, from Avocado to Yarrow.  Many of them are in ancient recipes for dyeing cloth, and I am quite interested in trying some to see what results.

For now, I will keep making cards. I purchased more watercolor paper yesterday, so perhaps I can do more leaf printing before all the leaves fall from the trees.

Don’t forget to redeem your Bonus Days coupons.

Host Code: RKS93T47

Us this code when placing an order through my online store to earn free stamps. Go here to get all the details.

Card Cuts: Early Espresso: card base 5-1/2″ x 8-1/2″, scored at 4-1/4″: So Saffron: front mat 4-1/8″ x 5-3/8″, inside sentiment panel 3-1/4″ x 4-1/2″, leaf 2″ x 2″; Gray Granite: front sentiment 2-1/2″ x 3-1/2″, inside mat 4″ x 5-1/4″.

Product List

Uncategorized

Stampin’ Up! Rooted in Nature Birthday forHappy Inkin’ Thursday Blog Hop

Blog hop header
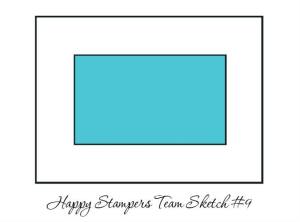
Another Thursday and another Happy Inkin’ Thursday Blog Hop. Today we are working with this sketch challenge

July 5 sketch

and here is the card I created for this challenge.

wild wing creations-1


I wanted a masculine card, and, while it isn’t over the top, I think it fills the bill because of the textures and colors.

I started with a sheet of the Nature’s Poem DSP and built the card from there, using the sketch as my guide, turning it on its side.

The card base is Sahara Sand with a mat of Soft Suede that I ran through the Pinewood Planks 3D Dynamic Textured Impressions Embossing Folder. That’s a mouthful! This will hereafter be known as a DTIEF!wild wing creations-1

The two offset panels are from Nature’s Poem and Wood Textures. In fact, everything on this card uses all those same papers and card stock.

Cut all the pieces first. Then, dry emboss the Soft Suede card stock mat. This was adhered to the card base with Tear & Tape.

A panel of light colored Wood Textures DSP was then Liquid Glued to this mat. The lovely Nature’s Poem panel with leaves was also adhered with Liquid glue.

Now for the fun part. I die cut several leaves and branches from Wood Textures DSP and Soft Suede card stock using the set of 3 leaves in the Sweet Cake Thinlets. I also die cut one of the triple leaf from Nature’s Roots Framelits from the Wood Textures DSP. I then dry embossed it using the embossing plate in the set of Framelits.

wild wing creations-2


The sentiment circle in Wood Textures DSP is cut with the #4 circle from Layering Circles (I number from smallest to largest) Framelits. The Happy Birthday sentiment from Perennial Birthday, is stamped in Soft Suede ink. I then adhered the triple leaf to the circle before adding the Stampin’ Dimensionals and Linen Thread.

I did a dry fit of all the leaves and stems under the circle before adhering everything. When I was satisfied with the layout, I began layering with Liquid Glue. Several Stampin’ Dimensionals are on the back of the circle, with some of them for the express purpose of holding the Linen Thread loops in place. The rest adhere the threaded up circle over the arrangement of leaves.

I thought it looked a bit plain, so I grabbed my Soft Suede Stampin’ Write Marker and began to outline the circle. I knew I couldn’t make a perfect circle freehand, so I deliberately added a few bumps and ‘feathers’ which I think looks better than if it were a perfect outline.

wild wing creations-5

The inside has no sentiment as I want to write a personal note here. The same card stock and DSP are on the inside with the Soft Suede acting as the first mat, the leafy DSP under the Wood Textures DSP. This is my writing surface as it is light enough for text to show up. I considered adding a stamped leaf then decided against it. Now, I think it looks plain, so I may go back and add the triple leaf in a stamped off once Soft Suede in the corner.

The envelope flap has more of the DSP , and two of the triple leaves stamped on the front. One of them is full strength Soft Suede and the other is stamped again without re-inking.

I like this challenge and think I will do another card using the same sketch. Stay tuned.

If you like the DSP used here, just bear in mind that we have a special offer going until the end of July. If you purchase 3 packages of DSP, you get the 4th one free. How’s that for a deal? There are some lovely ones, so this is a good time to stock up. More information below.

Now, on with the hop. Just click the ‘Next’ image to see what the talented Amy has for you, or click on any name to go to her blog.

Blog hop next button

Amy Koenders

Shelagh Freemantle

Mary Deatherage

Kristi Gray

Jaimie Babarczy

Sue Prather

Karen Finkle

Julie Johnston (you are here)

If you do not have a demonstrator and would like to order products, just click on the image at right that says “Order Online”. If your order is at least $50 before shipping and taxes, and you use the Hostess code below, you will earn a free gift from me. You also earn Bird Egg points. Go here for all the details. Just a reminder, if your order is over $150, DO NOT use the hostess code or you will nullify your rewards. You will get your rewards, plus a gift from me without using the Hostess code.

Here are the Designer Series Paper Packs that are eligible for the Buy 3, Get one Free promotion.

07-01-18_flyer_dsp_sale_us1.jpg

Card Cuts for today’s card: Soft Suede card stock: front embossed mat 4″ x 5-1/4″, inside mat 4″ x 5-1/4″, leaves  2″ x 3″; Sahara Sand: card base 5-1/2″ x  8-1/2″ scored at 4-1/4″; Wood Textures Designer Series Paper: front panel 3″ x 4-1/4″, inside liner 3-1/8″ x 4-3/8″, circle and leaves 2″ x 4″; Nature’s Poem Designer Series Paper: front panel 3″ x 4-1/4″, inside mat 3-3/4″ x 5″


Product List

Uncategorized

Stampin’ Up WOOD

I hope you are all having a Fabulous Friday. And, why not? Friday is the day before the weekend, which makes nearly everyone happy, right?

My card for today is another one using the Happy Inkin’ Thursday Blog Hop sketch from yesterday, with a totally different take on it.

Here is the sketch we used, and that I am using again today.

3-15 graphic

And here is the card I created using that sketch

wild wing creations-4

This technique, called Black Ice, was developed, or invented if you prefer, by Melissa Kerman. You can see her video on this technique here

I wanted this to be all about trees and wood, so I used the Waterfront stamp set, Wood Textures Designer Series Paper, Leaflets Framelits and Pinewood Planks Dynamic Textured Impressions Embossing folder.

To begin, I took a panel of Copper Foil Sheets and ran it through the Big Shot in the Pinewood Planks DTIEF. With the Classic Basic Black Stampin’ Pad (regular ink pads won’t stick to the foil) and a light touch, I simply dragged it over the embossed copper. This really brought out the wood grain. This is the black of the black ice.

wild wing creations-4

I left this to dry thoroughly while I went on to other parts of the project.

I tried stamping the trees and mountains then die cutting with the maple leaf from the Leaflets Framelits, which didn’t work very well. Then, I cut first, then stamped my design and that was much better. Initially, I used a dark wood (like the mat), rubbed my Versamark pad over the edges and heat embossed it in copper. Hmmm. A little dark, but maybe ok once it is on the copper.

wild wing creations-4

To be certain the copper piece was dry I did use my Heat Tool for a brief time. To do the ice technique, simply drag the Versamark pad over your panel, cover it in Clear Embossing Powder and heat emboss. Lovely. I really do like this look!

This was Liquid Glued to a piece of the dark Wood Textures DSP and onto my card base. Using Tear and Tape, I adhered a strip of Burlap Ribbon to the card front. I also die cut two branches from the Seasonal Layers Thinlits, one in Basic Black and one in the dark Wood Textures DSP. I offset these and Liquid Glued them over the Burlap Ribbon.

I put several Stampin’ Dimensionals on the back of my stamped and embossed leaf, wound some Copper Metallic Thread around and adhered it over the ribbon and branches. Remember I said it was a little dark? Well, it was a LOT dark and I really didn’t like it. The remedy was to die cut the leaf from a lighter Wood Textures DSP, then stamp the design. I simply Liquid Glued this over the darker leaf, offsetting it a bit so the copper edge would show. AHA! Much better.

wild wing creations-1

Now, the ribbon is wrong! Oh. My. Gosh. Now what? Well, I don’t like this, so what harm can it do to try to fix it before it goes in the trash? I took my Basic Black Stampin’ Write Marker and went over the ribbon. I had to do this twice to get it really black, but I am thinking you could use a black permanent marker too, which might be darker.

This helped enough that the card was salvaged, but, if I do it again I will use a strip of black card stock instead. But then, the black branch won’t show up. I will think of something!

On the inside I ran my Embossing Buddy over the paper before I stamped the sentiment in Versamark. This is also from the Waterfront stamp set, stamped  on the dark Wood Textures DSP, covered in Copper Emboss Powder and heat set. This panel was liquid glued to a Copper Foil Sheets panel and into the card base.

wild wing creations-5

For the envelope, I stamped the same trees and mountains on the front, then added a piece of the Wood Textures DSP to the flap. All done. I think this needs improving, but I like the basic idea. Must try it again.

Card Cuts: Basic Black: card base 5-1/2″ x 8-1/2″ scored at 4-1/4″, branch 2″ x 5″, Copper Foil Sheets: embossed panel 3-3/4″ x 5″, inside mat 3-11/16″ x 4-15/16″; Wood Textures Designer Series Paper Pack  front mat 4″ x 5-1/4″, inside sentiment panel 3-3/8″ x 4-5/8″, leaf 4″ x 4″, branch 2″ x 5″

Product List

Uncategorized

Stampin’ Up Wood Textures Birthday

Good Sunday Morning All

Today is supposed to be another beautiful day, so after church I am going out with camera to see what goodies I can find. In the meantime, I want to share a card with you that I first found on Pinterest. I went to Su Mohr’s blog, https://aromasandart.com/lovely-as-a-tree/, and since it uses a couple of my favorites, I thought I would CASE for my nephew’s birthday.

wild wing creations-1

I am definitely going to play around with this idea some more, so who knows what may be in the future!

For starters, I made the card base from Early Espresso, then, with sheets from the Wood Textures Designer Series Paper Stack, I proceeded to make the card front.

I cut the top piece to 4-1/4″ x 5-1/4″, then centered the leaf from Leaflets Framelits and ran it through the Big Shot. On a sheet of the plainer wood grain sheets from Wood Textures, I stamped the image from Lovely as a Tree in Soft Suede. These two pieces were adhered together with Foam Adhesive Strips, then to the card base with Liquid Glue. I placed the Foam Strips very close to the edges of the back of the tree rings, and around the leaf. Since I didn’t like the look of the white edges of the foam, I used my Early Espresso Stampin’ Write Marker to color them.

This completes the card front. Easy Peasy.

wild wing creations-1

For the inside, I used the tree rings paper for a mat, then stamped my sentiment and the Lovely as a Tree image on a plainer  wood grain panel. The sentiment is from Perennial Birthday and stamped in full strength Soft Suede. The trees were stamped off once before stamping on the liner panel. I used my Stamp-A-Ma-Jig to line up the sentiments. All were adhered with Liquid Glue.

On the envelope, never to be naked, I again stamped the Lovely as a Tree image on the front in Soft Sued, and used more of the tree rings DSP on the flap.

This card is quick and simple, yet, I think it is lovely. Try one for yourself.

The current HOST CODE, good through March 15 is UJWYGVQJ

Use this code when placing your order through my website for a free gift. Details can be found on the customer rewards page.

If you don’t have a demonstrator, and need supplies, just click on the Shop Online button at right. Be sure to check out the rewards page to receive free goodies.

Cuts: Early Espresso: 4-1/4″ x 11″ scored at 5-1/2″; Wood Textures Designer Series Paper Stack: tree rings die cut 4-1/4″ x 5-1/2″, tree rings mat 4″ x 5-1/4″, plain (front) 4″ x 5-1/4″, plain (inside) 3-3/4″ x 5″

Product List