
I hope you are all having a Fabulous Friday. And, why not? Friday is the day before the weekend, which makes nearly everyone happy, right?
My card for today is another one using the Happy Inkin’ Thursday Blog Hop sketch from yesterday, with a totally different take on it.
Here is the sketch we used, and that I am using again today.

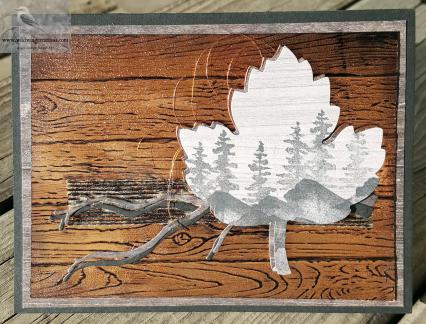
And here is the card I created using that sketch

This technique, called Black Ice, was developed, or invented if you prefer, by Melissa Kerman. You can see her video on this technique here
I wanted this to be all about trees and wood, so I used the Waterfront stamp set, Wood Textures Designer Series Paper, Leaflets Framelits and Pinewood Planks Dynamic Textured Impressions Embossing folder.
To begin, I took a panel of Copper Foil Sheets and ran it through the Big Shot in the Pinewood Planks DTIEF. With the Classic Basic Black Stampin’ Pad (regular ink pads won’t stick to the foil) and a light touch, I simply dragged it over the embossed copper. This really brought out the wood grain. This is the black of the black ice.
I left this to dry thoroughly while I went on to other parts of the project.
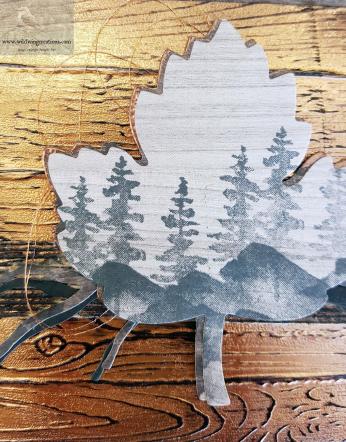
I tried stamping the trees and mountains then die cutting with the maple leaf from the Leaflets Framelits, which didn’t work very well. Then, I cut first, then stamped my design and that was much better. Initially, I used a dark wood (like the mat), rubbed my Versamark pad over the edges and heat embossed it in copper. Hmmm. A little dark, but maybe ok once it is on the copper.

To be certain the copper piece was dry I did use my Heat Tool for a brief time. To do the ice technique, simply drag the Versamark pad over your panel, cover it in Clear Embossing Powder and heat emboss. Lovely. I really do like this look!
This was Liquid Glued to a piece of the dark Wood Textures DSP and onto my card base. Using Tear and Tape, I adhered a strip of Burlap Ribbon to the card front. I also die cut two branches from the Seasonal Layers Thinlits, one in Basic Black and one in the dark Wood Textures DSP. I offset these and Liquid Glued them over the Burlap Ribbon.
I put several Stampin’ Dimensionals on the back of my stamped and embossed leaf, wound some Copper Metallic Thread around and adhered it over the ribbon and branches. Remember I said it was a little dark? Well, it was a LOT dark and I really didn’t like it. The remedy was to die cut the leaf from a lighter Wood Textures DSP, then stamp the design. I simply Liquid Glued this over the darker leaf, offsetting it a bit so the copper edge would show. AHA! Much better.
Now, the ribbon is wrong! Oh. My. Gosh. Now what? Well, I don’t like this, so what harm can it do to try to fix it before it goes in the trash? I took my Basic Black Stampin’ Write Marker and went over the ribbon. I had to do this twice to get it really black, but I am thinking you could use a black permanent marker too, which might be darker.
This helped enough that the card was salvaged, but, if I do it again I will use a strip of black card stock instead. But then, the black branch won’t show up. I will think of something!
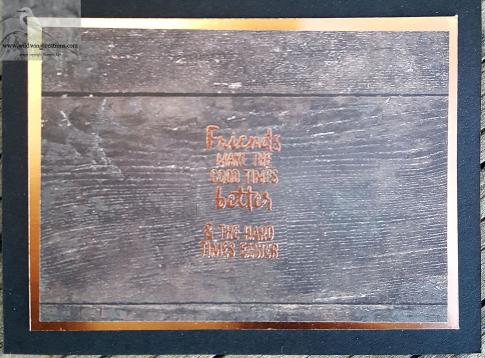
On the inside I ran my Embossing Buddy over the paper before I stamped the sentiment in Versamark. This is also from the Waterfront stamp set, stamped on the dark Wood Textures DSP, covered in Copper Emboss Powder and heat set. This panel was liquid glued to a Copper Foil Sheets panel and into the card base.
For the envelope, I stamped the same trees and mountains on the front, then added a piece of the Wood Textures DSP to the flap. All done. I think this needs improving, but I like the basic idea. Must try it again.


Card Cuts: Basic Black: card base 5-1/2″ x 8-1/2″ scored at 4-1/4″, branch 2″ x 5″, Copper Foil Sheets: embossed panel 3-3/4″ x 5″, inside mat 3-11/16″ x 4-15/16″; Wood Textures Designer Series Paper Pack front mat 4″ x 5-1/4″, inside sentiment panel 3-3/8″ x 4-5/8″, leaf 4″ x 4″, branch 2″ x 5″
Product List


 Burlap Ribbon")


Sounds like you remained pretty calm about the whole thing. I really like how you created your own wood panel. I really looks like a piece of wood. I’ll be interested in seeing what you do when you try again. I’ve only thrown one card away. I wouldn’t have sent it to my worst enemy even if I had one!
LikeLike
Literally LOL at your last sentence!! I can’t imagine you having any enemies, never mind a worst one! Thanks for the comments. Trying again today.
LikeLike
Very nice! Love how you stepped thru the things you didn’t like as you made your card and then reached the end with a beauty! Really like the stamped leaf – and the embossed/black ice’d card front! 🙂
LikeLike
Thank you so much, Mary. I hesitated to ‘tell all’, but sometimes people need to know that just because you blog (bloviate?) doesn’t mean you know everything, or that it always is easy. I did struggle with this one, but will try again and see if I can improve it. Thanks again.
LikeLike
Oh wow Julie, I think that it turned out perfectly! I love the wood texture, it looks so real! 🙂
LikeLike
Thank you Amy. I struggled a bit with this one, but in the end it was ok. Am going to try another one and make some changes.
LikeLike
I love this card…it’s so striking. Great use of the black ice technique. Thank you for sharing your trials and thinking as you made the card. Nice to know others struggle too!
LikeLike
Thank you, Susan. I hesitated to ‘tell all’, but realize that sometimes others need to know that it doesn’t always come easy, which, I think, gives them hope that they can succeed as well.
LikeLike
OH MY how I love how you stepped through the missteps and suggested the best results. The resulting card is fabulous, and you’ve cleared the way for success for us. THANK YOU!
LikeLike
Thank you so much for your kind comments. If you come up with a better result please let me know.
LikeLike
thanks Tiffany!
LikeLike